Benefits of Using the express-generator-typescript Module
Written by
Sean Maxwell
Last updated on:
October 1, 2025
Written by
Last updated on:
October 1, 2025
I love Node.js and use it for the back-end on all of my side projects and have been using TypeScript with it ever since I started using Node. There are plenty of articles out there explaining how to set up a Node.js API with TypeScript. As a serial side-project maker, though, I had to repeat a lot of steps manually with every new project. So, I decided to automate this process by making my own npm library, Express-Generator-TypeScript.
Overview
Basically, what Express-Generator-TypeScript does is allow you to spin up a new Express.js web-server fully configured with TypeScript. The linter, logging tool, build scripts, and even a unit-testing framework are all set up for you, as well as the latest version of all the libraries is downloaded for you. Here’s a list of some of its benefits:
Adds and configures nodemon for the development environment so your server reloads on code changes.
Sets up the linter and provides some common default settings.
Sets up logging.
Loads environment files for development, testing, and production environments. You can easily add your own as needed.
Provides unit-tests for every express route using Jasmine as the framework.
Provides type-safe express request and response objects that can be updated over time as your req.body and res.objects grow.
Adds build scripts.
Sets up TSconfigpaths so you can easily access content throughout the project.
Usage
Getting started
To start a new project with Express-Generator-TypeScript (assuming you already have Node.js/npm/npx installed), all you have to do is run its npx optional project name and bam! That’s it! If you don’t enter a project name, the default express-gen-ts will be used.
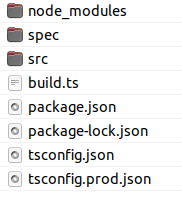
Project Breakdown
When you open up the project folder, you’ll see the src/and spec/folders and a bunch of configuration files.
The src/ folder contains, of course, your source code, and the spec/ folder contains unit-tests. To start the server in development mode, at the root directory of a command prompt, run the command npm run start:dev. This will run the typescript source files directly with ts-node. To run the project for production, you will need to build it first with npm run build. This will create a dist/folder with the transpiled.js files. To run the server for production, do npm run start.
The folders under src/ are pretty self-explanatory in what they do, but I want to mention the daos/ folder because I’ve been asked a lot about it before. DAO stands for Data-Access-Object, and this is where you want to put all your database queries. Wrapping database queries in a dao layer is generally a good idea because it allows you to avoid repeating code, more easily mock database calls for unit-tests, uphold the separation of concerns principle, and swap out different databases later if you should choose to do so.
To run unit-tests, simply do npm run test. There is an existing unit-test, written in TypeScript, for each default route. Nodemon is also configured for unit-tests, but if you want to run tests without hot-reloading, you can do npm run test: no-reloading.
The Front End
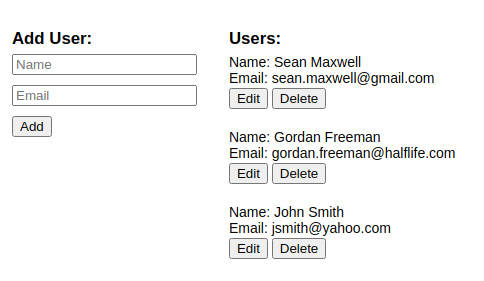
When you create a new project, if you navigate to localhost:3000 (or localhost:8081 for production) in a browser, you will see this:
Right now, a.json file in the dao/ folder will be used as a mock database. Due to the popularity of SPAs these days, the amount of front-end code is very minimal and is not set up with TypeScript or any other superset languages. The purpose of this view right here is just to give you a demo of the GET, POST, PUT, and DELETE routes.
Optional Features
There are two significant optional features you can choose when setting up a new project. Should your project require them, they will save you a significant amount of configuration time. The first option sets up authentication for your server.
Authentication
The "with-auth" option sets up a new sample project complete with production quality authentication. It uses a json-web-token for client-side authentication and requires you to login before you can access the standard user routes. This option also adds json-web-tokens and checks for them when running the unit tests. The full command to use this option is: npx Express-Generator-TypesScript—with-auth project name.
You’ll see this image when navigating to localhost:3000 using the with --with-auth option.
Socket-io
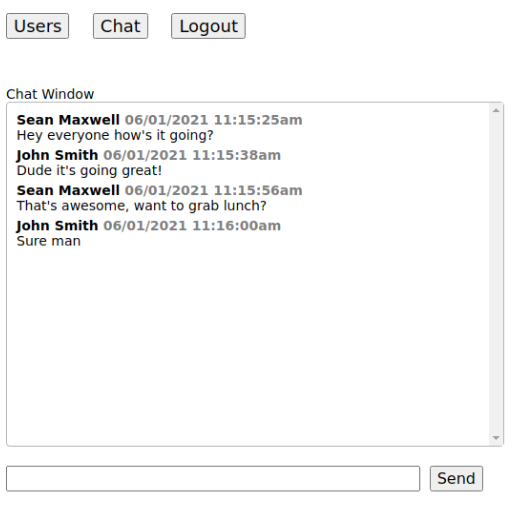
Socket-io is a very popular event-listener library used frequently for chat apps, user logins, etc. Like authentication, this requires a lot of initial setup. Because so many of my side projects have used socket-io, I just decided to include this as a little bonus option. If you ever create a website that involves collaboration between multiple users (i.e. a project planning tool), there’s a good chance you’ll end up using socket-io.
To use the socket-io option enter: npx express-generator-typescript –socket-io “project name”. This option also includes all the authentication features. After logging in you will see this at localhost:3000/chat:
Final Notes
Even if you already have an existing Express/Typescript project, express-generator-typescript can still be useful if you are trying to learn how to set up authentication or socket-io for your site and run unit-tests on them.
This library uses the bcrypt module for authentication, which can be fussy on Windows. It is highly recommended that you use this via wsl2 if you are on Windows, because bcrypt (and some other NodeJS features) requires something called Windows Build Tools to be set up.
Additionally, if you want to use a front-end framework such as Angular or React, simply generate a new project using their command lines and replace the front-end/ folder under src/ with the new folder.
What is the main purpose of the express-generator-typescript module?
The module automates the setup of a fully configured Express.js project with TypeScript. It comes preconfigured with essential tools like a linter, logging, build scripts, unit testing, environment management, and TSconfig paths, so you can quickly start building your API without manually setting everything up.
How does the module help speed up development?
It eliminates repetitive setup steps by providing a ready-to-use project structure. Features like nodemon for auto-reloading, built-in testing with Jasmine, and preconfigured TypeScript paths let developers focus on writing application logic instead of boilerplate configuration.
What are DAOs, and why does the generated project include them?
DAO stands for Data Access Object. The generated project includes a daos folder, which is where you manage database queries. Using DAOs helps reduce duplicated code, makes it easier to mock database calls for unit tests, and supports swapping databases later without restructuring the rest of your application.
Does the module support authentication and real-time features?
Yes. When generating a project, you can choose optional features:
Authentication: Sets up JWT-based authentication with secure login routes and token validation.
Socket.io: Includes real-time event handling, useful for apps like chat platforms or collaborative tools. This option also includes authentication by default.
Can I use express-generator-typescript with existing projects or front-end frameworks?
Yes. Even if you already have an Express and TypeScript project, you can still explore the generated code to learn authentication, socket.io integration, and unit testing. For front-end frameworks like React or Angular, you can generate the app separately and replace the generated front-end folder under src with your framework’s codebase.
AI is changing software development.
The Engineer's AI-Enabled Development Handbook is your guide to incorporating AI into development processes for smoother, faster, and smarter development.
Enjoyed the article? Get new content delivered to your inbox.
Subscribe below and stay updated with the latest developer guides and industry insights.
Thank you! Your submission has been received!
Oops! Something went wrong while submitting the form.
We use cookies to provide our services, to allow us to better understand our audience, and to provide and serve personalized ads or content. By using our website, you consent to the terms of our Privacy Policy and our Cookie Policy, and the use of cookies, pixels, and other technology as described more fully therein
The GPC signal has been honored.
Thank you! Your submission has been received!
Oops! Something went wrong while submitting the form.
.svg)