Code, Deploy, Succeed: Next.js, Firebase, and Tailwind CSS Unleashed
Written by
Jose Betancur
Last updated on:
October 1, 2025
Written by
Last updated on:
October 1, 2025
In this tutorial, we will leverage three key and cutting-edge technologies: Next.js, Firebase, and Tailwind CSS. Our mission? To guide you in building a comprehensive application that demonstrates the capabilities of these tools.
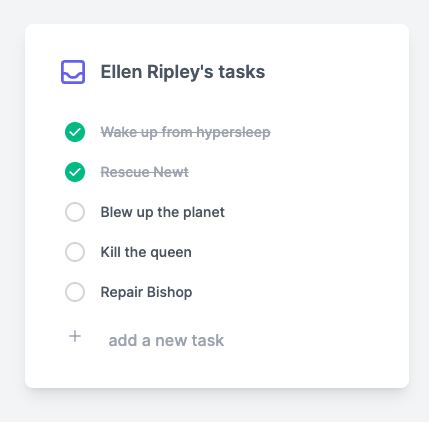
In the hustle and bustle of our daily lives, maintaining organization can be quite challenging. Balancing work, personal commitments, and everything in between often leaves us juggling numerous tasks and responsibilities, making it easy to become overwhelmed and lose track of what needs to be done. This is where a reliable to-do list application becomes an indispensable ally. And that's precisely what we are here to help you build in this tutorial.
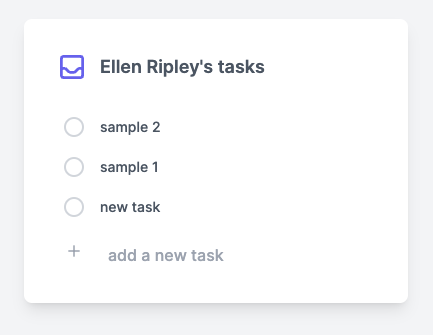
This is what your final product will look like:
Environment settings
Before diving into coding, you should ensure you have the right environment set up. You will start by installing a package that simplifies the process of creating a basic Next.js application with all the necessary configurations.
1. Get your Next.js application ready
In your terminal, run this command to install the package needed to create Next.js projects:
npx create-next-app
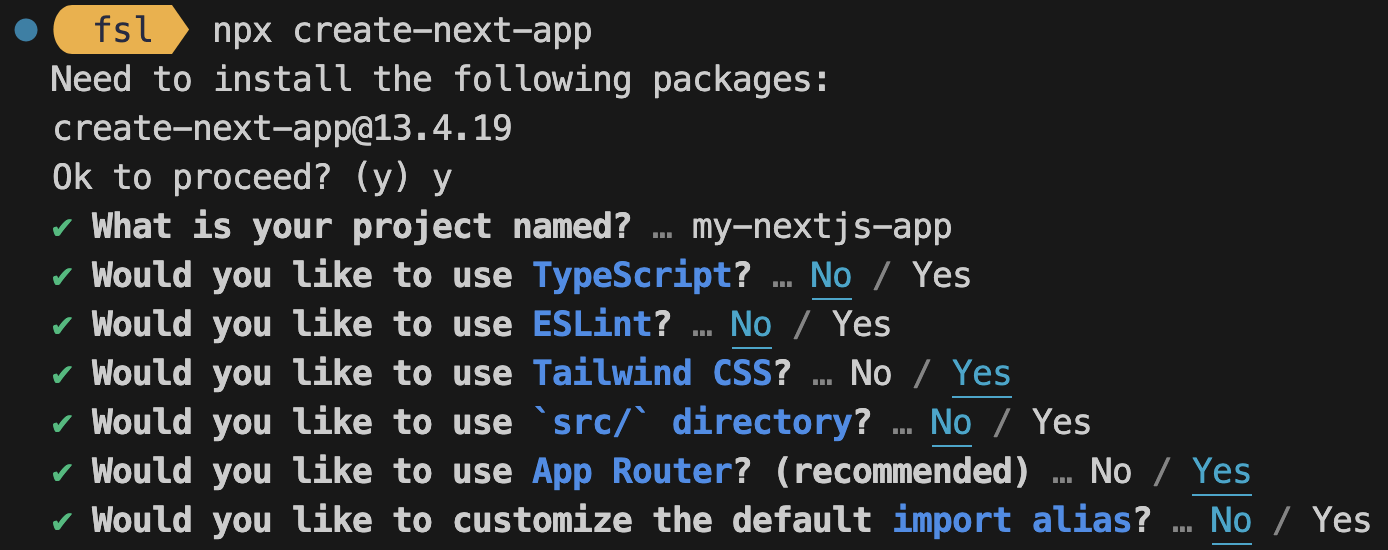
The setup process will prompt you for some project configurations. Here's what you need to use for your app:
Project name:my-nextjs-app
TypeScript: No
ESLint: No
Tailwind CSS: Yes
src/ directory: No
App Router (recommended): Yes
Customize default import alias: No
After providing the initial configurations, you will notice that a new folder has been created. To explore the files inside and run your development server, enter:
npm run dev
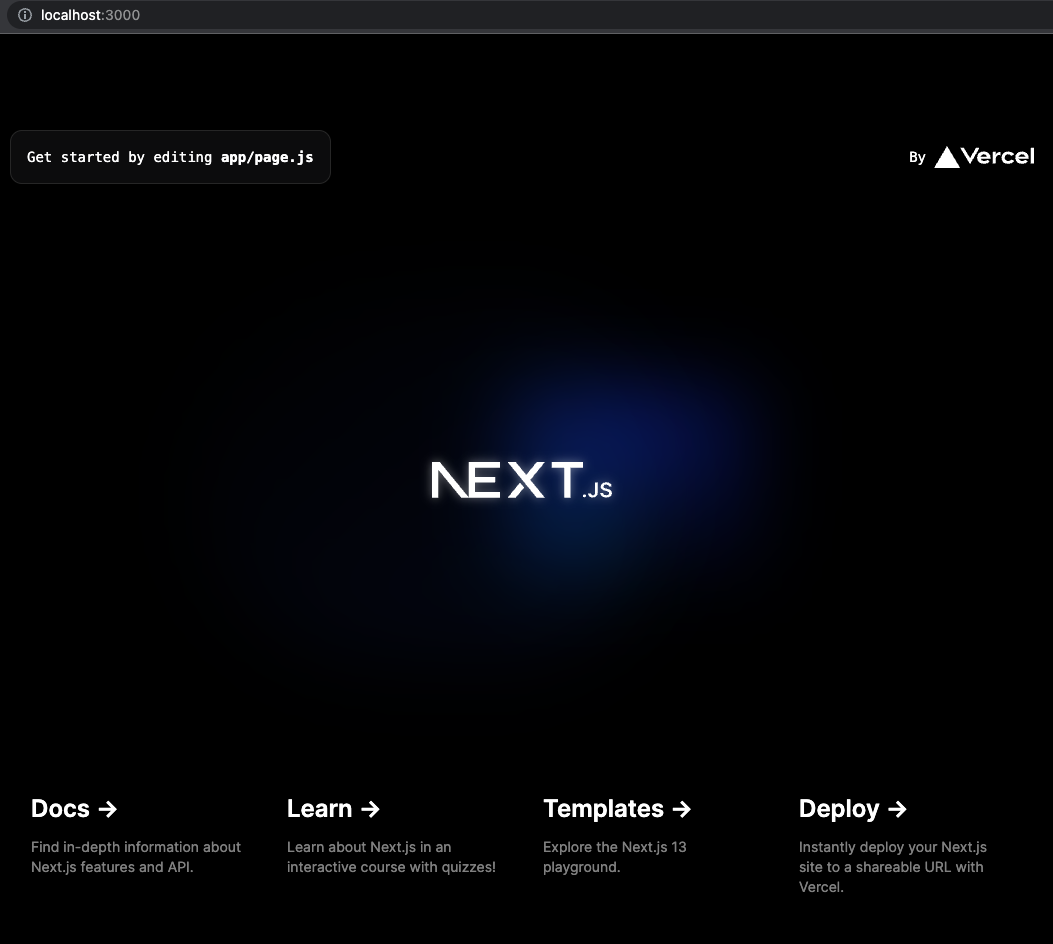
Once you launch the development server, you will be able to access your application in your web browser by navigating to http://localhost:3000/.
2. Customize your Next.js application
Upon running the development server, you will be able to see the default page of your Next.js application. This page is managed by thepage.js file located in the app/ folder. You will customize this page to display the to-do list application as you progress in your development journey.
Set up a basic HTML template in the page.js file to get started, and replace all main HTML elements with the following code:
For this application, you are going to create new to-do tasks that will be stored in Firebase and change their status from incomplete to complete. First, you will create a state for the to-do list to display some demo static information. Later on, you will change it to use real data from a database storage in Firebase.
1. Create a to-do list with static content
The first step is to add code to render a to-do list with static content. Add these lines just before the return statement in the page.js file:
In the code above, you are only showing the lines that need to be modified. If you compare this part of the code with the previous one, you will notice that you are basically mapping the itemsarray to show every task, rendering its name, and displaying the checkbox according to its status (complete or incomplete).
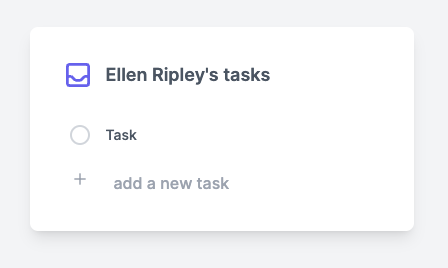
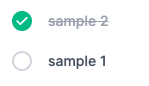
At this point, this is what your application will look like:
Now, call the addItem function when the button is clicked, and add a listener for the change event to update the input value as a new item in our state. Please note that you have just introduced a couple of functions,setNewItemandnewItem, to create a new to-do with an empty name and status by default.
At this point, you can only add new tasks locally, so your next step will be to set up Firebase to store this data in the cloud.
3. Set up Firebase
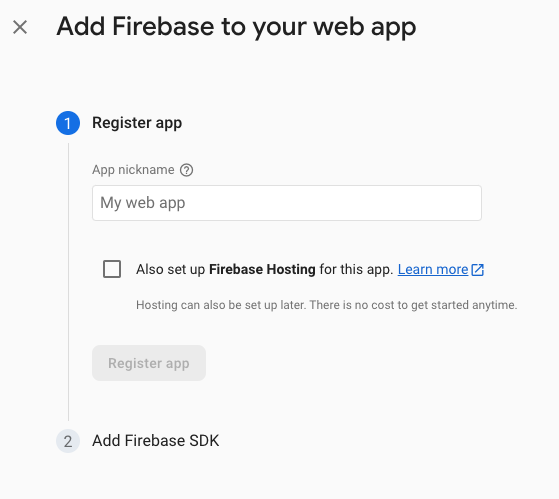
You will now create the Firebase application using the Firebase console. You won’t need Google Analytics for this project, so you should disregard the following recommendation:
Next, install Firebase locally with this command:
npm install firebase
Once you have your app created, you need to register it and create a file with the Firebase connection. You can get the information from Firebase.
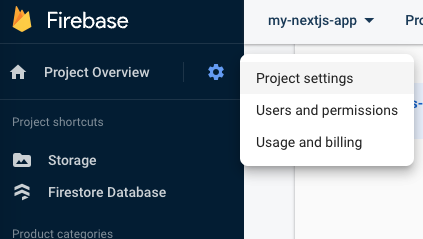
From Firebase’s “Project Overview” section, access the project settings to get the connection code:
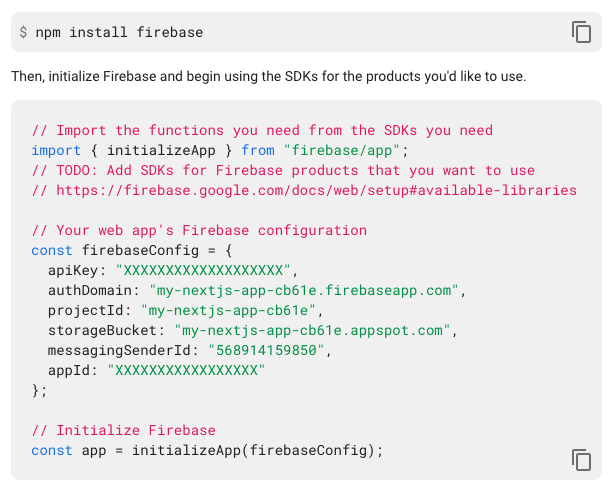
You should be able to see the project configuration details:
Now you can copy the information in a file named firebase.js in the app/folder of the project. Inside firebase.js, add the following code to get the database from Firebase:
import { getFirestore } from"firebase/firestore";
exportconst db = getFirestore(app);
Finally, this is what your Firebase connection file should look like:
app/firebase.js
// Import the functions you need from the SDKs you needimport { initializeApp } from"firebase/app";
// TODO: Add SDKs for Firebase products that you want to use// https://firebase.google.com/docs/web/setup#available-librariesimport { getFirestore } from"firebase/firestore";
// Your web app's Firebase configurationconst firebaseConfig = {
apiKey: "XXXXXXXXXXXXXXXXXXXXXXXXXXXXXXXXXXXX",
authDomain: "my-nextjs-app-cb61e.firebaseapp.com",
projectId: "my-nextjs-app-cb61e",
storageBucket: "my-nextjs-app-cb61e.appspot.com",
messagingSenderId: "568914159850",
appId: "XXXXXXXXXXXXXXXXXXXXXXXXXXXXXXXXXXXX",
};
// Initialize Firebaseconst app = initializeApp(firebaseConfig);
exportconst db = getFirestore(app);
Since you have already set up Firebase for your project, you can now use it in your code to interact with the Firebase database and store your to-do list data.
4. Import Firebase connection
Next, import the Firebase connection by adding these lines at the beginning of the file:
app/page.js
"use client";
import React, { useState } from"react";
import {
collection, // Used to get a collection addDoc, // Used to add a new document query, // To make query of Cloud Firebase onSnapshot, // To take pictures doc, // Get a document runTransaction, // Execute a transaction} from"firebase/firestore";
import { db } from"./firebase";
5. Modify the ADD function
Here, you will enhance your addItem function to leverage your Firebase integration. This involves using Firebase functions like collection and addDoc since Cloud Firestore organizes data into documents stored within collections.
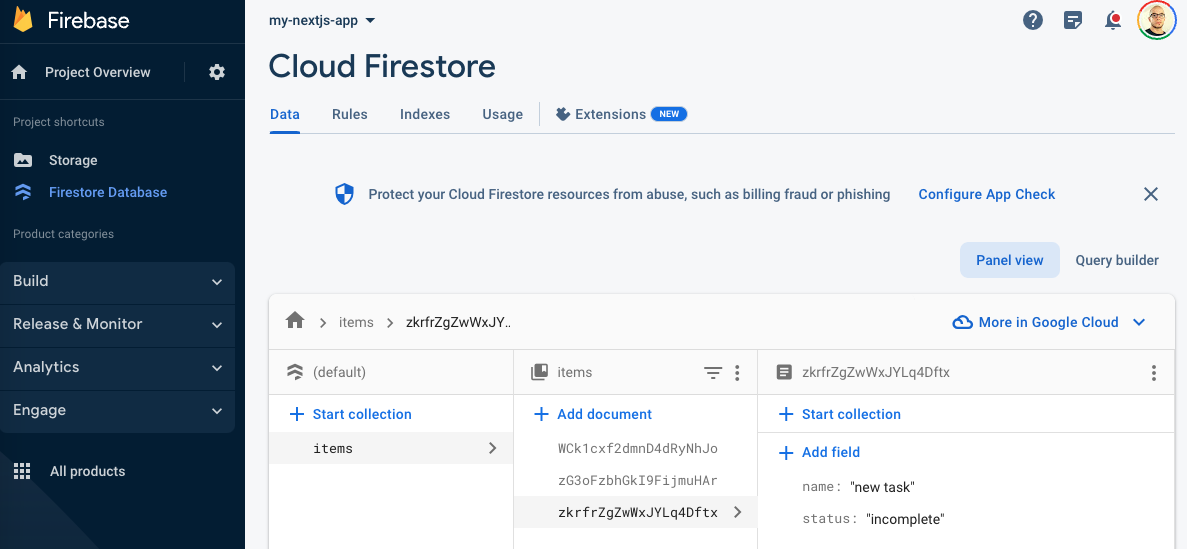
In the code above you are using your connection to Firebase to add a new document inside of a collection named “items” within your Cloud Firestore. If this collection doesn’t already exist, Firebase will create it for you. By default, every new task in the to-do list will have an “incomplete” status, allowing you to mark it as complete later on.
At this point you should be able to see the new to-dos stored in Cloud Firestore:
6. Read tasks from Cloud Firebase
The next step is retrieving your to-dos from Cloud Firebase. First, you will import the useEffect hook from React, which is designed for managing side effects in function components. You will use it to implement a task retrieval method and read each task from your to-do list.
In your app/page.js file, make sure to import useEffect:
With useEffect imported, you can fetch data from Cloud Firebase. To do this, create a query to access a collection named "items" using the query function and pass it to onSnapshot. This function gives you a real-time snapshot of the documents in the collection. Once you have that picture, you get all these documents and create an array called itemsArr, which holds the task data. Finally, set your component's state with this array.
With this code in place, your application should display the to-do list data retrieved from Cloud Firebase.
7. Update task status
The last step before moving to deployment is creating a function to update the status of each task in the to-do list. For that purpose, you will create an asynchronous function named updateItem that takes one parameter, id. Check the code below:
With this code, you can retrieve the document that needs updating from the "items" collection in Cloud Firebase using its id. Then, you use a transaction to update the item. If the current status is "complete," you change it to "incomplete," and vice versa. You can integrate this functionality into your task list by associating it with the respective checkboxes, allowing you to easily update the status of each task.
With these steps, your application should now retrieve and modify task statuses from Firebase.
Deployment
To deploy your application on Firebase Hosting, follow these steps:
1. Install Firebase Tools
Run the following command in your terminal to install Firebase Tools globally:
npm i -g firebase-tools
2. Log in to Firebase
Execute this command:
firebase login
An authentication window will appear. Log in using your Google credentials to continue.
3. Enable experimental web frameworks (if necessary)
If required, enable experimental web frameworks by entering:
firebase experiments:enable webframeworks
Now, you are ready to proceed with deploying your application to Firebase Hosting.
4. Initialize your project
Execute in your terminal:
firebase init hosting
Select a Firebase project to connect to your local project directory. Once you set up the hosting in your project, you will notice the addition of new files:
These files configure your Firebase project and define hosting parameters.
5. Launch your to-do list app!
It's time to share your hard work with the world. In your terminal, run this command:
firebase deploy
Watch as your to-do list application comes to life on Firebase Hosting! Now you can access your app through a URL similar to this one:
https://my-nextjs-app-cb61e.web.app/
You now have your own fully deployed to-do list application. Great job! 🎉🚀
To sum up
Combining technologies like Next.js, Firebase, and Tailwind CSS unlocks a world of possibilities, including:
Rapid development: Next.js simplifies the creation of dynamic web applications with its built-in server-side rendering and efficient routing.
Real-time data: Firebase provides a real-time database, enabling instant updates and seamless synchronization across users and devices.
Stunning UI: Tailwind CSS follows a utility-first approach, making it a breeze to craft visually appealing and responsive interfaces.
Scalability: Thanks to the synergy between Next.js and Firebase, your application can effortlessly scale as your user base grows.
By mastering these technologies, you'll be well-prepared to craft web applications that blend functionality and aesthetics seamlessly. The possibilities are boundless—happy coding!
------------------------------------
If you are ready to tackle new challenges and take your software development experience to the next level, explore our exciting job opportunities. We have amazing projects waiting for you!
What makes Next.js, Firebase, and Tailwind CSS a powerful combination?
These three technologies work together seamlessly to simplify development and improve performance:
Next.js handles routing, server-side rendering, and scalability for modern applications.
Firebase provides real-time data synchronization and secure cloud storage for tasks.
Tailwind CSS offers fast, utility-based styling for building responsive and visually appealing UIs.
How does Firebase manage the data in this app?
Firebase’s Cloud Firestore stores all tasks in a collection, with each task containing fields for the task name and its completion status. The app uses a real-time listener to fetch updates instantly whenever tasks are added, updated, or deleted, so users always see the latest data without refreshing.
Can I add and update tasks dynamically?
Yes. When you add a new task, it’s stored in Firebase and instantly appears in the app. Updating a task’s completion status is also real time — toggling a checkbox changes the task’s state between complete and incomplete, and the app immediately reflects that change across all connected devices.
How does Tailwind CSS improve development speed and design quality?
Tailwind CSS simplifies styling by providing prebuilt utility classes for layout, spacing, typography, and colors. In this app, it styles components like the task list, buttons, and checkboxes while keeping the codebase lean and maintainable. Its integration with developer tools also speeds up workflow and ensures a consistent, responsive UI.
How do I deploy the to-do list app to Firebase Hosting?
Deployment is straightforward:
Install Firebase CLI globally.
Log in to Firebase and connect your project.
Initialize hosting and configure your app.
Run the deployment command.
After completing these steps, Firebase gives you a live URL where your app is hosted and ready to use.
AI is changing software development.
The Engineer's AI-Enabled Development Handbook is your guide to incorporating AI into development processes for smoother, faster, and smarter development.
Enjoyed the article? Get new content delivered to your inbox.
Subscribe below and stay updated with the latest developer guides and industry insights.
Thank you! Your submission has been received!
Oops! Something went wrong while submitting the form.
We use cookies to provide our services, to allow us to better understand our audience, and to provide and serve personalized ads or content. By using our website, you consent to the terms of our Privacy Policy and our Cookie Policy, and the use of cookies, pixels, and other technology as described more fully therein
The GPC signal has been honored.
Thank you! Your submission has been received!
Oops! Something went wrong while submitting the form.
.svg)