Deploying your application is one of the last steps you’ll take when creating an app, but that doesn’t mean it’s not one of the most important parts of the software development process.
There are several technologies and tools out there that we can use to deploy applications, but Kubernetes (k8s) is one of the few (if not the only one) that offers system orchestration capabilities. With Kubernetes, we could easily manage multiple instances of the same application, even more, multiple applications in a single place.
Basic Setup
In this tutorial, we will be using Ruby 3.2.1 with Rails 7, but any other version is valid as well, just beware of the versions in the configuration files.
Ruby can be installed using the rbenv utility. (The instructions for this installation are in this link).
To install Ruby and Rails, we can run the following commands in our shell using rbenv:\
rbenv install 3.2.1rbenv global3.2.1ruby -v # you should see the correct ruby version
gem install rails
Once we have installed Ruby and Rails, we will be able to create a new Rails app by running this command:
rails new your-app-name --skip-test --api --skip-javascript
The previous command will create a folder with the basic structure for a minimal Rails application. In this case, we’re passing three options to the rails new command. --skip-javascript, instructs the Rails command to not create default setups to compile JavaScript code in our app. --api, sets up the project to be an API. --skip-test is used to not include the default unit testing configuration that usually comes with Rails.
For this tutorial we won't do any CRUD operations, so there’s no need to configure a Postgres database connection. By default, Rails will set up your application to use SQLite. In our case, it should be enough, and then, we should be able to run your application.
Let’s add some code
Now that we have our basic application setup, let’s try and add some code. But first, let’s run our app with the following command on our shell:
bin/rails server
Now, let’s go to the ApplicationController and add a dummy action that returns a plain text “OK”.
# ./app/controllers/application_controller.rb
classApplicationController < ActionController::API
def health_check
render plain: 'OK' end
end
Now we should map this endpoint in the routes file, otherwise we won’t be able to make requests to it. Go to the routes file and add:
Rails.application.routes.draw do get 'health_check', to: 'application#health_check'end
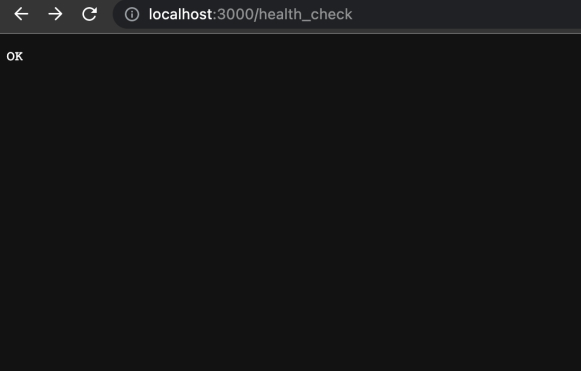
And that’s it, we should be able to go to our browser and type “http://localhost:3000/health_check”. The app should show something like this:
And that’s all the code we will need in our dummy Rails application.
Building a Docker image of our app
All our previous steps were just basic examples of how to create a Rails app. Now, let’s dive in on our topic at hand. To deploy an RoR application to Kubernetes we first need to build a Docker image of the application we previously implemented.
Usually, when building RoR Docker images, developers use alpine-based images, which already come with a lot of dependencies installed, but mainly the Ruby version our app is built with. However, for this example, we will be creating an Ubuntu-based Docker image of our application, as it gives us more flexibility in installing dependencies and setting up the Docker image the way we want it. Moreover, most users are familiar with Ubuntu OS, so most of the commands used for building the image will likely be known.
Let’s get hands-on work. We’ll be breaking down the Dockerfile and explaining each instruction, and then we will review its final version altogether in the end.
The very first thing we need in a Dockerfile is the FROMclause. It tells Docker which image we are going to use to build ours. In this case, we will use a built-in Ubuntu image, which only has the necessary packages to run a very basic Ubuntu OS, from which we can start building our RoR image by adding the necessary packages.
FROM ubuntu:latest
Now, to install ruby 3.2.1 we will use the Ruby version manager rbenv, which is one of the most straightforward methods to install Ruby. We can check other methods here. To use rbenv, we need to load it every time we start a new terminal, and we can simulate this action by adding the following to the Dockerfile:
SHELL ["bash", "-l", "-c"]
Here we are telling Docker to use bash to run all our commands. The -l option is used to load and run all the bash profile files. In this case, we want to run the ~/.bash_profile, in which we have the command to load rbenv. The-coption allows us to pass several commands as a string.
Now we need to install all the packages and dependencies, so we can install and run Ruby. This is a very common command for Ubuntu users:
The following command specifies the folder in which our Rails app code will reside:
WORKDIR /usr/src/app
At this point we haven’t installed rbenv, but we can add to the PATH environment variable the location to where the rbenv binaries will be:
ENV PATH="$PATH:/root/.rbenv/bin"
Notice that we are not using the docker RUNcommand to set an environment variable. ENV is the right way to set an environment variable in a Docker image.
Here we just set the bundle path:
ENV BUNDLE_PATH /usr/src/bundle
As our Dockerfile is located in the root folder of our Rails app, here the COPY command just duplicates all the files in our app to the Docker WORKDIRwe specify above:
COPY . .
We are now only missing installing Ruby, so let’s install rbenv first:
We could have just installed rbenv using the Ubuntu apt package manager, but it’s not updated with the most recent Ruby versions. So in the previous command, we are just installing an up-to-date rbenv version using its GitHub repository. Notice that the last command echoadds to the ~/.bash_profilefile the command needed to load rbenv in the terminal.
With rbenv already installed, we can go ahead and easily install Ruby and our project gems with the following commands:
RUN rbenv install 3.2.1 && \
    rbenv global 3.2.1 && \
    gem install bundler && \
    bundle config set --local without 'development test' && \
    bundle install
Let’s pay a little more attention to the bundle config set --local without 'development test’command. This one is important when building Rails apps for production since it excludes unnecessary gems used for development and testing.
Now, let’s expose the port in which our app is going to be running. By default Rails apps run in port 3000, so let’s go ahead and specify it:
EXPOSE3000
Finally, we only need to tell our Docker image how it will be executed. Let’s first create a bash script file in our ./binfolder:
./bin/start
#!/bin/bash --loginbin/rails s -b 0.0.0.0
Notice that with the -b 0.0.0.0, we are telling our app to be exposed to all network interfaces and not to localhost. As localhostinside the container points to itself, we won’t be able to access our application in our host machine through http://localhost:3000, because localhostin our host machine points to our machine itself, not to the container.
And then, we add to our Dockerfile this line, which tells Docker how to execute our app:
CMD ["bin/start"]
Notice that we could have put CMD ["bin/rails", “s”, “-b”, “0.0.0.0”] in our Dockerfile, but as I mentioned previously, we need to load rbenv for the system to be able to detect the Ruby versions installed. So, with this comment #!/bin/bash --login in the bash file, we are telling it to run the bash_profile files, so rbenv gets loaded.
And this is how our final Dockerfile should look like:
All we need to do now is build our image. We can do so with the following command:
(I am assuming you already have Docker installed on your machine, but you can do so by following the instructions here).
docker build --tag=your-image-name .
Notice that by default, the Docker docker build command looks for a file named ‘Dockerfile’ in the specified directory. In this case, the current directory ..
Deploying to Kubernetes
First things first, for production deployments, we would usually use a cloud service that provides us with a Kubernetes engine, like Google Cloud, AWS, etc. But, for this tutorial, we will be using Minikube, a tool for running Kubernetes locally.
If you are using a cloud service, for the Kubernetes engine to be able to pull our Rails image, you need to push the image to your cloud service registry (a registry is like a repository for Docker images). Each cloud service has its own registry, Google Cloud, AWS, etc. To be able to push images to your cloud registry you need to connect to it. You can do so by using the docker login command. After logging in to your registry, you only need to push your image using the docker push command. That way, your cloud Kubernetes engine will be able to retrieve and run your image.
With Minikube,we only need to run the following command:
(See here for instructions on how to install Minikube)
First, we start our Minikube Kubernetes engine:
minikube start
This will run a Kubernetes engine in the background.
Now, we just push our image to Minikube. There are several ways to do this (see here). But, we will do it using the following command:
minikube image load your-image-name
Deployment YAML
To deploy an image to Kubernetes you need a configuration file like the one below. It basically tells Kubernetes how to orchestrate your application. In this case, this is the configuration file we will be using, and I will break down the key properties.
kind: Deployment :specifies what kind of resources we will be creating. There are several types of resources in Kubernetes (see here). For example, a Pod is used to run a single instance of the image you specified in the configuration file. But, a Deployment is commonly used to handle a set Pods, and this is what we likely want in a production environment, as with every release we will be updating the Docker image our Pods are using, and this is something a Deployment handles more efficiently. Moreover, Deployments can run a set of Pods (called Replicas), and this is very useful for load-balanced systems; for example, there could be several instances of the same web application handling requests. This is very important to handle High Concurrency, as we could easily increase or decrease the replicas property in the yaml file on-demand.
metadata.labels: This is commonly used to identify our resource from other ones in the Kubernetes cluster.
name: It’s the identifier of our resource.
spec.replicas: Number of Pods we want our deployment to run. In this case, we set it to 2, so we have 2 instances of our application running. Later, we will add a load balancer, so requests are proxied to both instances.
spec.template.spec.containers: A Kubernetes Pod is a set of containers, so basically we can specify more than one image to be run in a single Pod. In this case, we are only specifying our single Rails app image.
spec.template.spec.containers.image: The name of our Docker image. In the case of Minikube, this works by just specifying the image name. In a cloud service, you might have to specify the complete registry image URL, e.g., gcr.io/<google-cloud-project-name>/your-image-name
spec.template.spec.imagePullPolicy: In the specific case of Minikube, we set this property to Never because Minikube has access to the image locally. But when using a cloud service, we might need to set it to “Always” as Kubernetes needs to pull the image from the registry.
spec.template.spec.ports.containerPort: This has to be the same port we exposed in our Docker file.
spec.template.spec.readinessProbe: Kubernetes needs a way to know a Pod is ready and running. So, here we are just triggering a request to the endpoint we previously implemented in the Rails app. In a real production environment, we might want this endpoint to trigger real health checks like the database connection, etc.
spec.template.spec.resources: This is an important property as here we specify the resources our containers will use, like CPU, Memory, etc.
All we are missing now is to create our deployment using the kubectl tool (see here to install).
kubectl create -f ./deployment.yaml
Adding a Service
By default, Kubernetes resources are not available outside the Kubernetes cluster. To make them available you need to route incoming cluster requests to your Deployments or Pods resources. There are several types of services Kubernetes offers to achieve this, like LoadBalancer, NodePort, Ingress, etc. (see here).
For our case, as we have two instances of our application running we need a LoadBalancer, so requests are routed to both containers. We can expose our deployment outside the cluster with the following command:
This command will create a Kubernetes Service resource that exposes our app externally. You can set the port number you want, Kubernetes will route requests to the ports specified in the deployment yaml file.
Finally, our cluster needs a public IP to start receiving requests. You can read more about it on your cloud service documentation, e.g., Configuring Domain Name Static IP for Kubernetes on Google Cloud. With Minikube, things are a lot simpler, we only need to run the following command:
minikube tunnel
It basically exposes the Kubernetes cluster using the localhost (127.0.0.1)IP address. Make sure you are not running bin/rails s on your machine and that port 3000 is free before running the minikube tunnel command.
And that’s it, you should be able to go to http://localhost:3000/health_check on your browser and see the same response we saw at the beginning of this tutorial:
Conclusion
Kubernetes is a great alternative to deploy applications to production environments. It really eases and fastens the delivery process and saves us a lot of time doing software releases. With the proper CI/CD integration, we could easily deploy applications by just pushing a commit to our Git repository. Also, we can easily increase the number of instances of our load-balanced applications when there are high peaks in the number of visits to the website, and then decrease the number of replicas again when concurrency is low. Most robust software systems have this capability to react on demand.
Why use Kubernetes for deploying a Rails application?
Kubernetes simplifies deploying, managing, and scaling applications. For Rails apps, it allows you to orchestrate multiple instances, manage high concurrency, balance workloads, and easily integrate with CI/CD pipelines for automated deployments. It’s especially useful when handling production environments with varying traffic demands.
Do I need Docker to deploy a Rails app on Kubernetes?
Yes. Kubernetes runs containerized applications, so you first need to package your Rails app into a Docker image. Once built, that image can be deployed to Kubernetes. This approach ensures consistency across environments and simplifies scaling, monitoring, and updating your app.
How does Minikube help when deploying locally?
Minikube provides a lightweight way to run Kubernetes locally. It lets you test your deployment, load balancer configuration, and health checks before pushing your app to a production Kubernetes environment like Google Cloud or AWS. It’s ideal for development and testing phases.
What is the role of the Deployment YAML file in Kubernetes?
The Deployment YAML file defines how Kubernetes should orchestrate your Rails app. It specifies:
The number of replicas (instances of your app)
The Docker image to run
Port configuration
Health checks using readiness probes
Resource limits for CPU and memory By updating this file, you can easily manage scaling, performance, and deployment behavior.
How does Kubernetes handle load balancing for Rails apps?
Kubernetes uses Services to route traffic to your application’s Pods. By exposing your Deployment as a LoadBalancer service, incoming requests are automatically distributed across multiple instances of your Rails app. This ensures better performance, higher availability, and smoother handling of traffic spikes.
AI is changing software development.
The Engineer's AI-Enabled Development Handbook is your guide to incorporating AI into development processes for smoother, faster, and smarter development.
Enjoyed the article? Get new content delivered to your inbox.
Subscribe below and stay updated with the latest developer guides and industry insights.
Thank you! Your submission has been received!
Oops! Something went wrong while submitting the form.
We use cookies to provide our services, to allow us to better understand our audience, and to provide and serve personalized ads or content. By using our website, you consent to the terms of our Privacy Policy and our Cookie Policy, and the use of cookies, pixels, and other technology as described more fully therein
The GPC signal has been honored.
Thank you! Your submission has been received!
Oops! Something went wrong while submitting the form.
.svg)