Integrating GitHub Actions and Docker for a Java Project
Written by
Fernando Sanabria
Last updated on:
October 1, 2025
Written by
Last updated on:
October 1, 2025
In today's fast-paced development ecosystem, continuous integration and deployment (CI/CD) play a vital role in maintaining agility and delivering high-quality software. The use of tools that seamlessly integrate into our development workflow can significantly reduce overhead and streamline processes.
Enter GitHub Actions and Docker—two powerful platforms that, when combined, can supercharge the development lifecycle of your Java project. This tutorial will explore the integration of GitHub Actions with Docker to automate essential tasks such as building, testing, and deploying Java applications.
In a landscape where speed and precision are the standards, workflow automation emerges as a time-saver, error-reducer, and collaboration enhancer. By the end of this tutorial, you will have a clear grasp of how to set up GitHub Actions and Docker for your Java project, and you will see the positive impact they can have on your development process.
Setting the stage
We will use a straightforward Java 11 project with Gradle, complete with tests and a connection to a MongoDB Atlas database. Firstly, we will create a GitHub repository for our project and make some configurations.
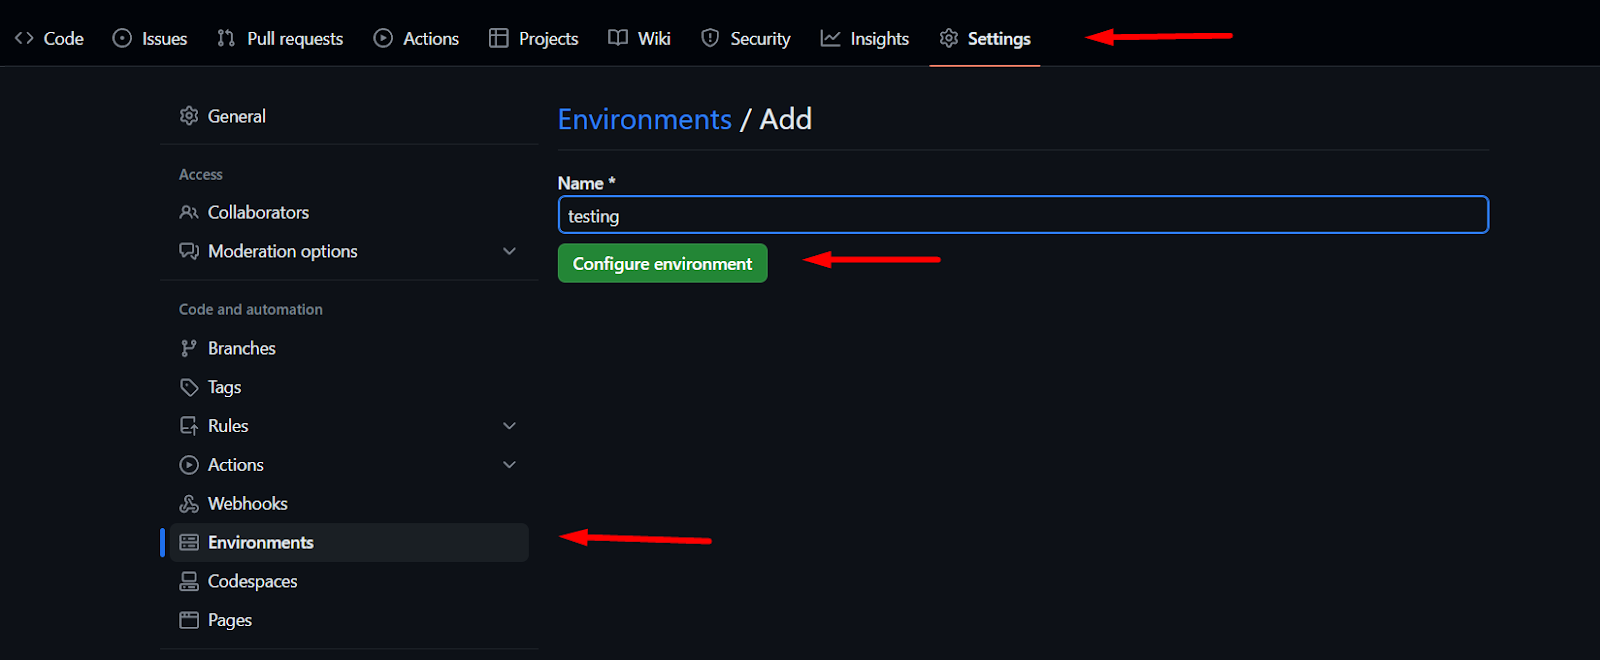
To define your testing environment within your GitHub account, navigate to “Settings,” then select “Environments,” and create your environment as shown in the image below:
You will use a MongoDB database to test your application, which you can set up using MongoDB Atlas. When you create your cluster, it will look like this:
Add the network access configuration:
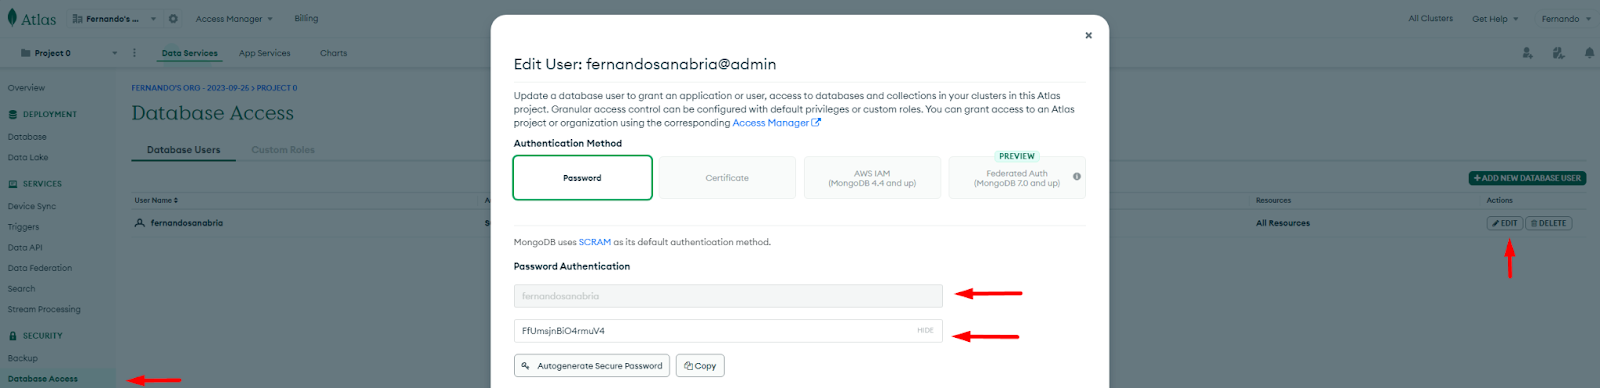
Next, go to the “Database Access” section and generate a password to connect to your database:
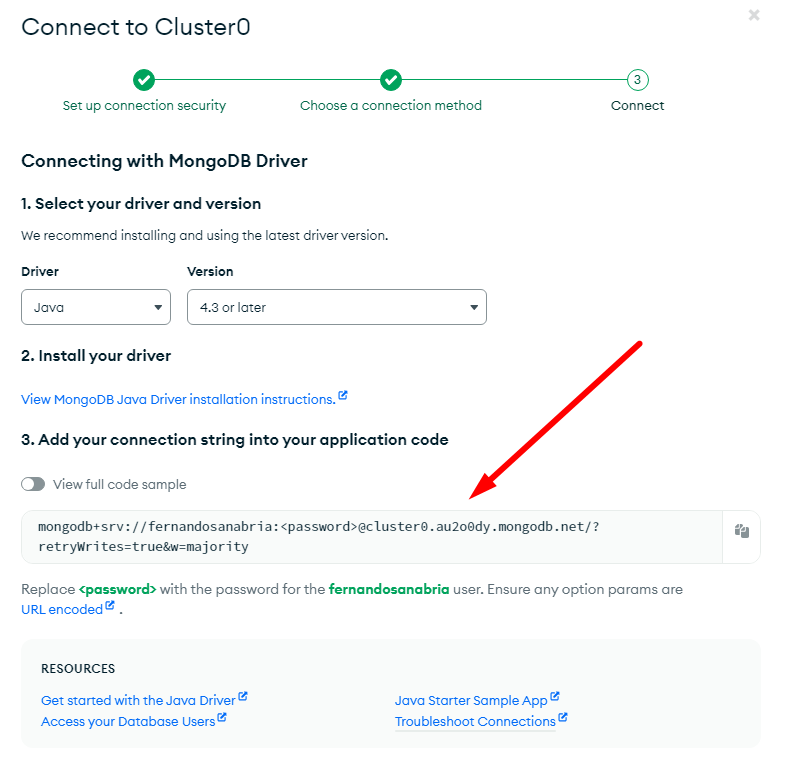
Click on “Connect.” You will need the string connection shown in the image below:
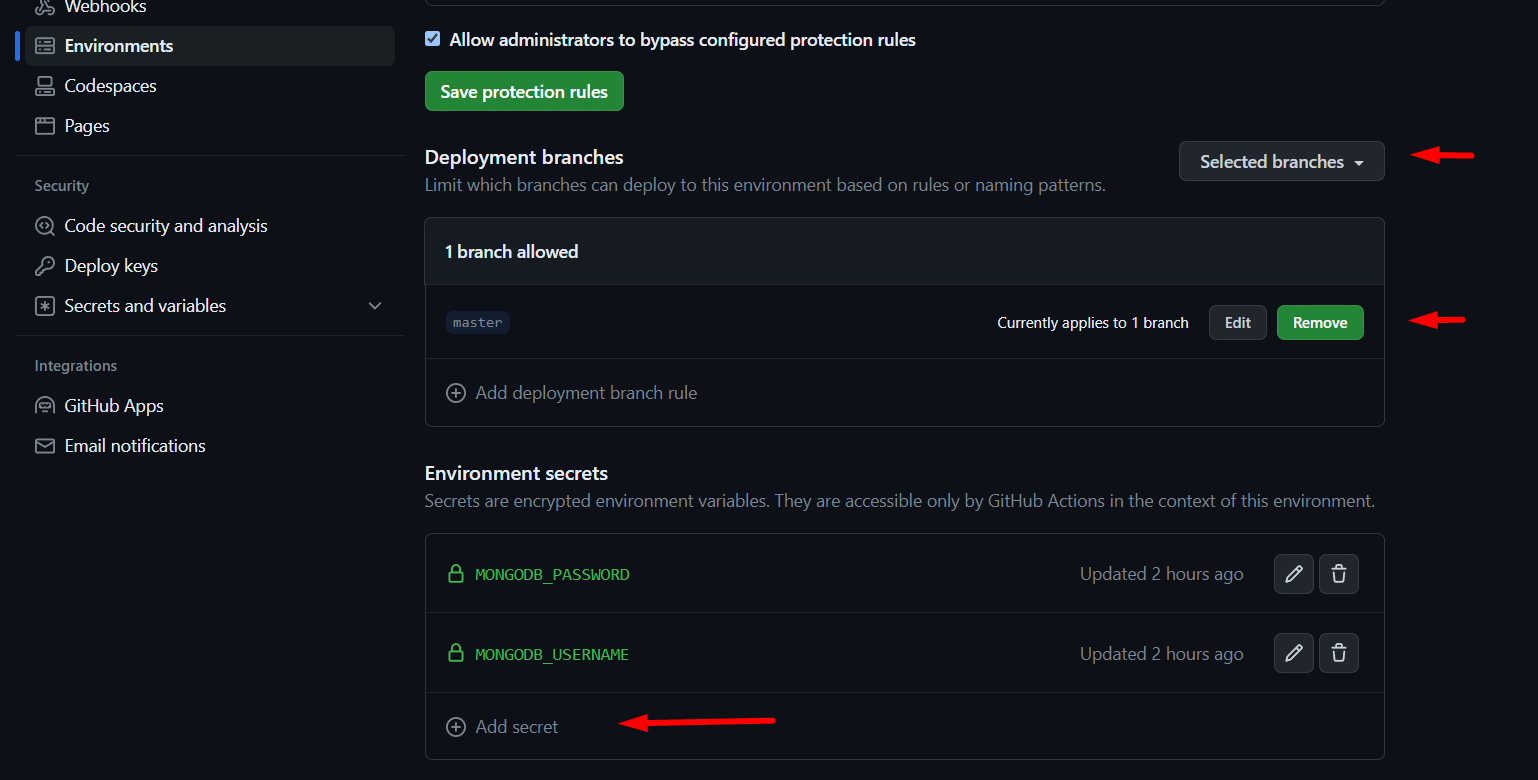
After this, you can create the secrets in the previously built testing environment, as shown in the below image; notice that you can specify the branch to use the environment secrets.
Configuring GitHub actions workflow
Now, let's navigate to the workflow file. It should be located in the root of your project at this location: GitHub\workflows\{yourFileName}.yml. The CI workflow caches Gradle dependencies, grants execution permissions to the Gradle wrapper, and runs build and test commands. After testing, it initializes the server and provides MongoDB-related configurations. For security reasons, MongoDB Atlas credentials, such as the username and password, are retrieved from GitHub Secrets. Upon successful testing, a deployment step outputs MongoDB information and designates a port for deployment, typically set to 3000.
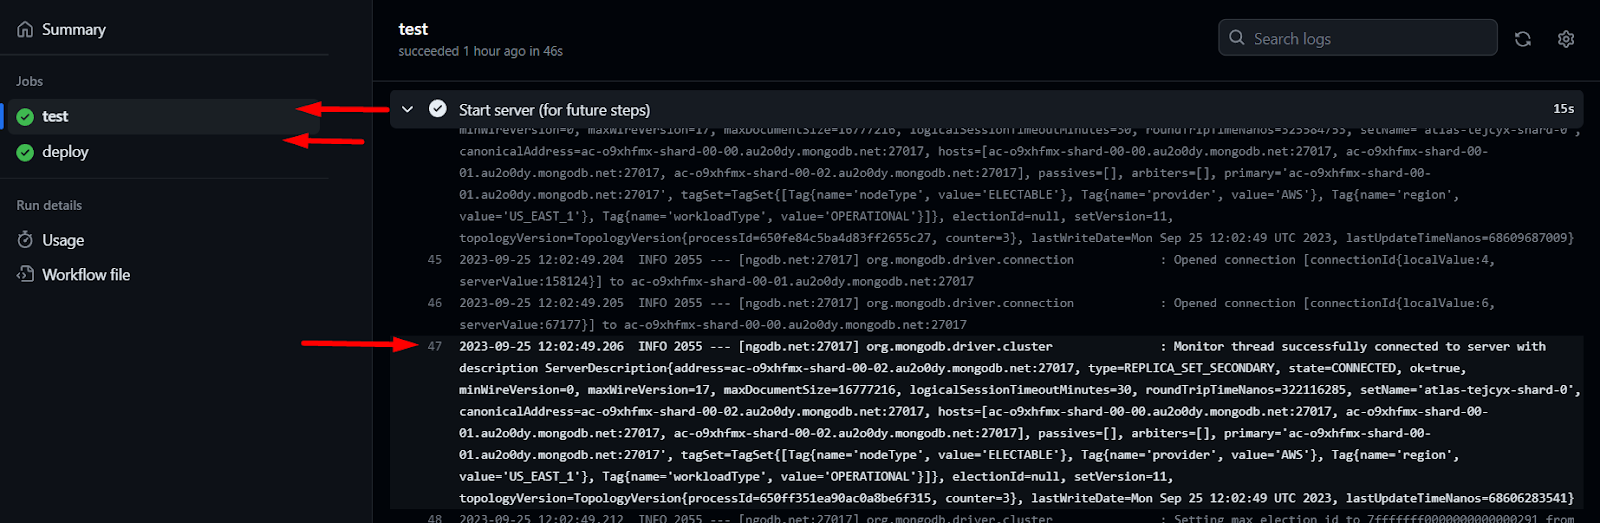
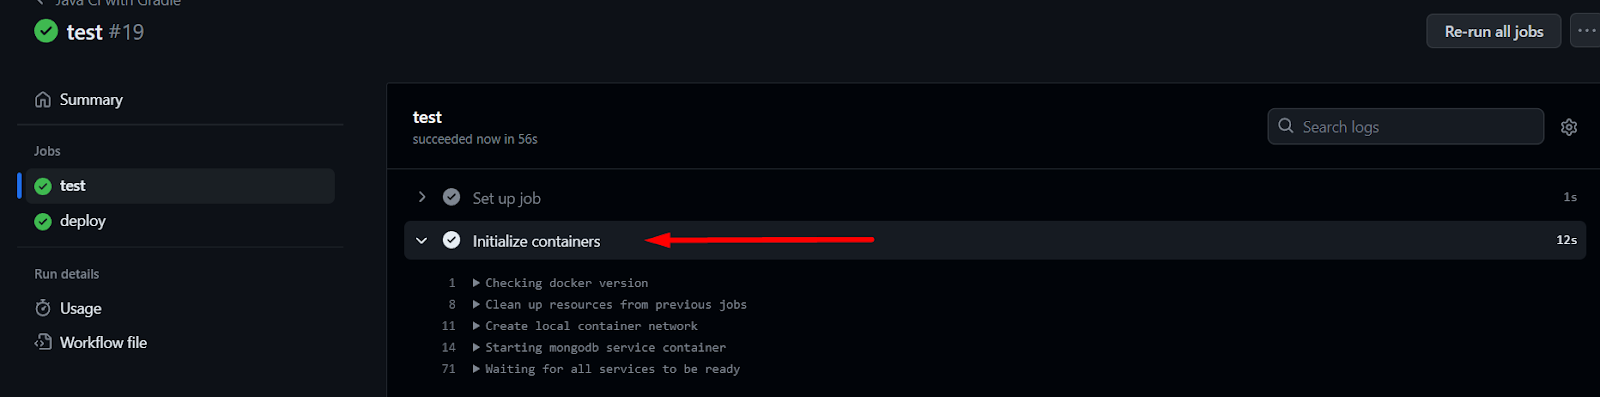
After making changes to your local Git repository and pushing them to the remote repository, navigate to the “Actions” tab to see your workflows. In the case of your most recent commit, you will see something like this:
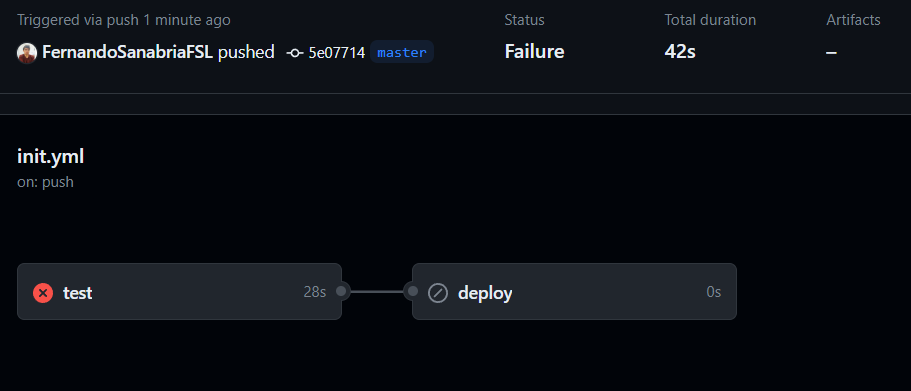
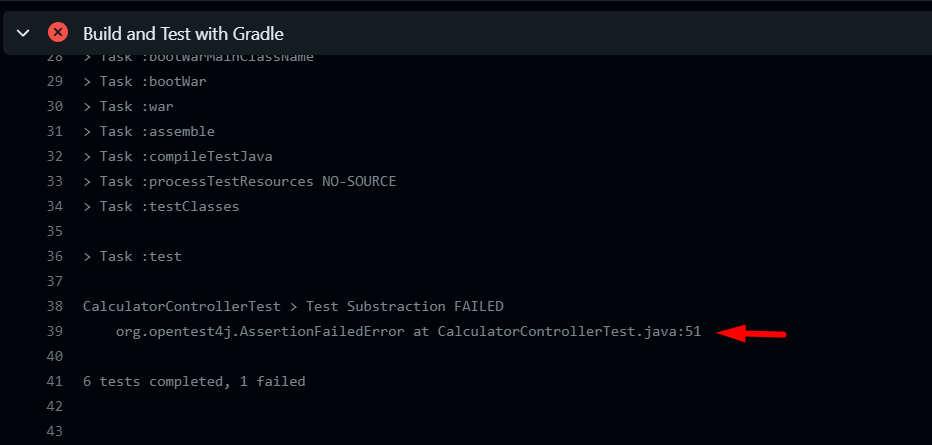
As you can see, the database connection was successful and the project ran without conflicts. If you do an update to fail a test and then push the commit, you will see something like this in the GitHub interface:
Integrating Docker for CI/CD
Finally, you will use a service container to prove the advantages of integrating Docker into your CI/CD pipeline; for that, you will create a local database instance to check that your application is working by modifying your workflow file as follows:
You should notice that there are two relevant differences in the testing job:
In the first setup, the MongoDB connection used an SRV connection protocol and specific cluster addresses and credentials from GitHub secrets.
The next configuration employed a simplified MongoDB connection, with the credentials hardcoded. This setup also includes a services section that configures a MongoDB service using the official image, with specified root credentials and a port mapping of 27017.
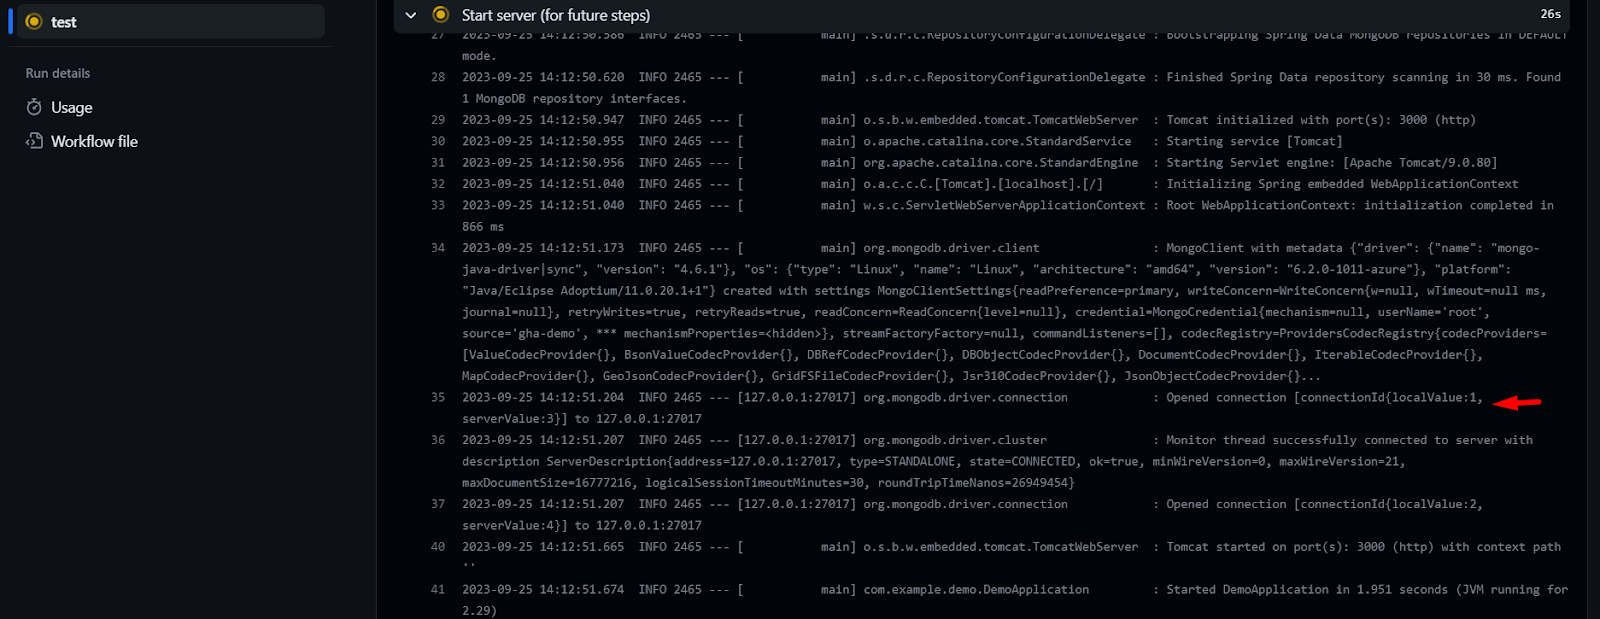
When you push the changes to the repository, the triggered workflow will have the new step shown below:
The previous YAML configuration shows that service containers offer clear benefits for CI/CD workflows. First and foremost, they create a separate environment for dependencies, ensuring that applications use consistent, predetermined versions of services such as databases, regardless of where the CI/CD process runs. This results in more predictable and reproducible test outcomes.
Moreover, by defining services directly within the configuration, developers can easily define and control the environment, making it simpler for team members to understand the necessary dependencies. This also streamlines the setup, reducing the need for external configurations or scripts to initialize services.
In the provided YAML context, the MongoDB service container can be quickly set up with the desired settings, removing potential inconsistencies or complexities that might arise from manually configuring databases.
Conclusion
By following this guide, you have successfully established a robust CI pipeline for your Java project using GitHub Actions and Gradle.
You set up triggers to automatically start your CI process when code is pushed to the master or dev branches.
In the testing phase of your workflow, you connected your environment with a MongoDB database, saved time by caching Gradle dependencies, fixed file permissions, and smoothly built and tested your Java app.
Moving forward, you learned how to deploy your app and got insights into its environment.
Embracing this automation not only guarantees the consistency and reliability of your applications but also significantly reduces the need for manual intervention. As a result, it streamlines your development process, minimizing the risk of human errors and enabling you to allocate more time and resources to critical tasks such as innovation or feature development. Ultimately, this seamless integration of GitHub Actions and Gradle empowers you to focus on what truly matters—delivering high-quality software efficiently.
How can GitHub Actions improve CI/CD for Java projects?
GitHub Actions automates key parts of the CI/CD pipeline, including building, testing, and deploying Java applications. By defining workflows, you can trigger actions whenever code is pushed to your repository, ensuring consistent builds and faster feedback loops. For Java projects, this reduces manual intervention and helps maintain code quality across different environments.
Why should Docker be integrated into a CI/CD workflow?
Docker creates a predictable, isolated environment for your application and its dependencies, which leads to more consistent testing and deployment. When combined with GitHub Actions, service containers can be defined directly in your workflow to spin up components like MongoDB during tests. This approach eliminates issues caused by environment mismatches and simplifies setup for all team members.
How does this integration handle database testing?
In this setup, MongoDB is configured in two ways: either by connecting to a managed MongoDB Atlas cluster or by using a Docker-based service container defined in the workflow. The service container spins up a local MongoDB instance during testing, providing a lightweight, controlled database environment. This allows developers to run reliable integration tests without requiring external configuration.
What are the key benefits of using service containers in GitHub Actions?
Service containers allow you to define supporting services like databases, caches, or queues directly in your CI/CD configuration. This ensures your application always runs against consistent, predetermined versions of dependencies. It also improves reproducibility, reduces setup complexity, and keeps workflows easier to understand for new developers joining the project.
What impact does combining GitHub Actions and Docker have on deployment speed and reliability?
By integrating GitHub Actions and Docker, your Java project gains a fully automated pipeline that builds, tests, and deploys code consistently across environments. Docker guarantees stable application behavior by packaging dependencies, while Actions automate the workflow from start to finish. The result is fewer deployment failures, faster release cycles, and higher confidence in every production release.
AI is changing software development.
The Engineer's AI-Enabled Development Handbook is your guide to incorporating AI into development processes for smoother, faster, and smarter development.
Enjoyed the article? Get new content delivered to your inbox.
Subscribe below and stay updated with the latest developer guides and industry insights.
Thank you! Your submission has been received!
Oops! Something went wrong while submitting the form.
We use cookies to provide our services, to allow us to better understand our audience, and to provide and serve personalized ads or content. By using our website, you consent to the terms of our Privacy Policy and our Cookie Policy, and the use of cookies, pixels, and other technology as described more fully therein
.svg)