Perhaps you have trained your own TensorFlow model or want to implement one in a controllable AWS serverless infrastructure. Sometimes your model can not be used with TensorFlow Lite or you want to have the full version, then you realize that AWS Lambda has a storage limit of 250MB (512MB unzipped).
That is not even the size of some versions of the TensorFlow libraries. So, you wonder: is it possible to use Lambda functions to deploy TensorFlow models? The answer is yes! And, in this article, we'll use AWS Lambda + API Gateway + EFS to build a simple web application that can identify images based on a pre-trained model.
A controllable, serverless infrastructure gives us the power to implement what we want. In the case of AI models, it can be to protect our models, reduce costs, and, of course, scalability with little DevOps. There are other ways to achieve this, like using Docker containers and Amazon ECR, but these have some important costs associated with them. If we use Lambda, we will always have one million free requests (always), the same for API Gateway (first year), and 5GB of space for EFS (first year).
We are going to use Python in Lambda here, but this can also be used to work with JavaScript or other languages. Better architecture can be achieved with AWS Amplify, Serverless, Terraform, or other IaC frameworks, but the focus of this tutorial is to give a broad overview of how to use EFS + Lambda. Please keep in mind that this tutorial does not have any important considerations in matters of security; its purpose is to only show how to use these components.
All steps in this tutorial work under the free tier of Amazon AWS.
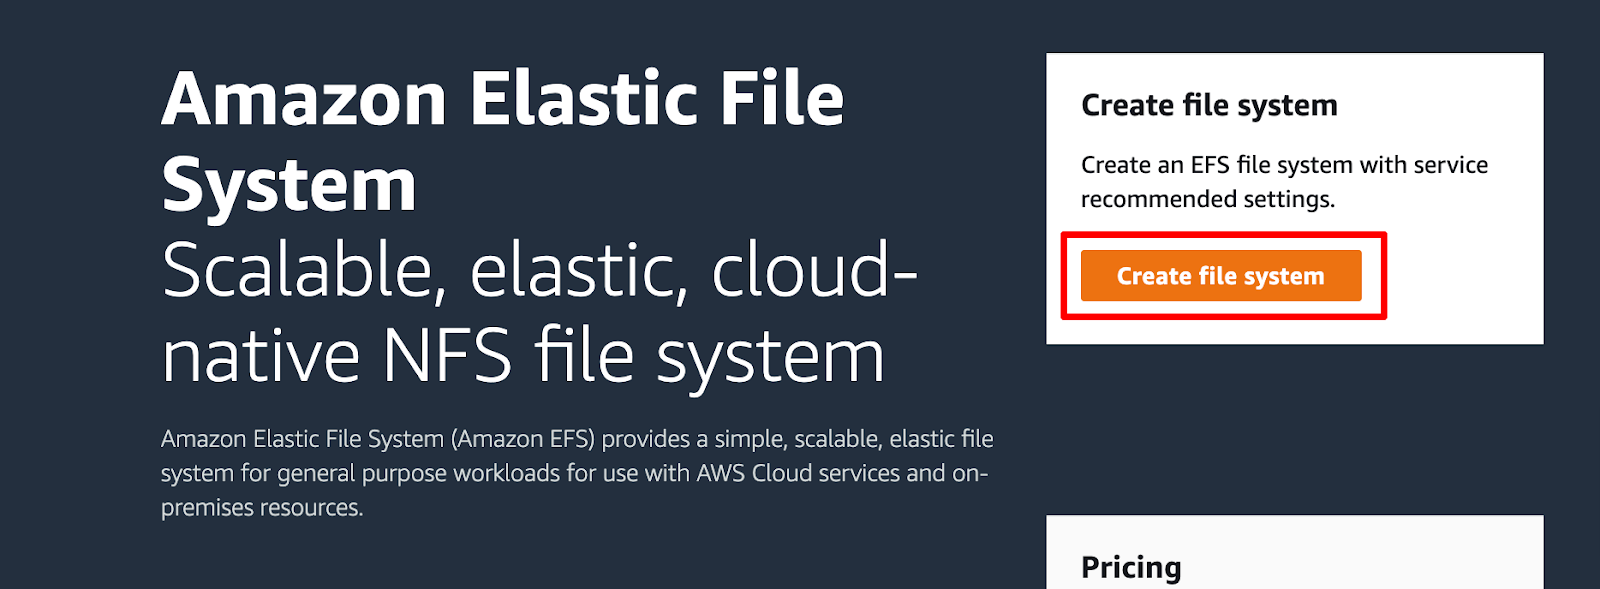
Creating an EFS file system
Let's enter EFS in the Amazon AWS console and click on Create file system.
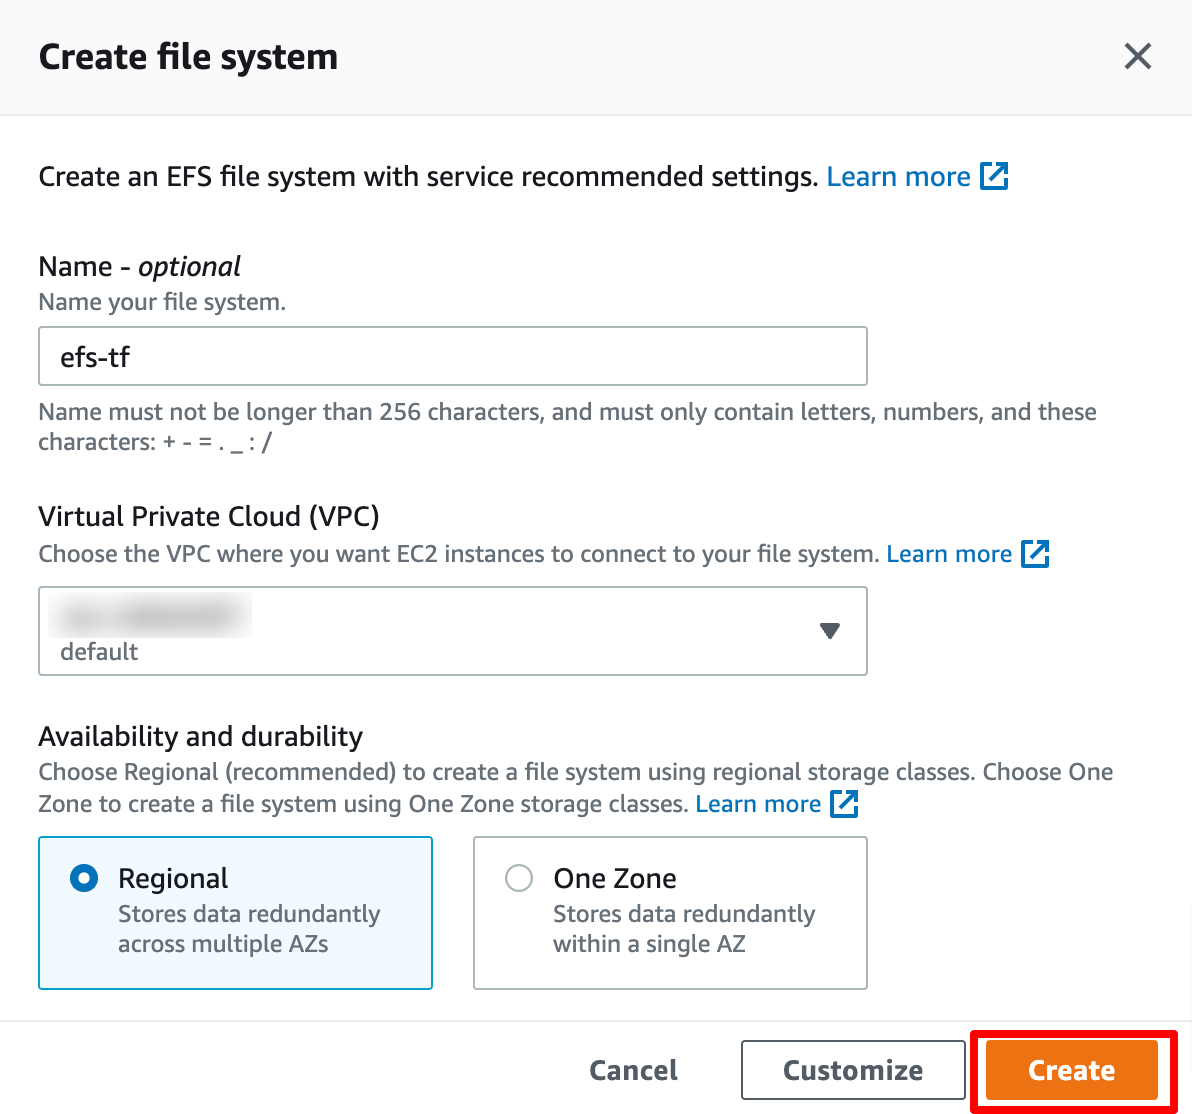
Let's add the desired name, select a VPC (remember this one, because it is going to be used later), set it to Regional availability (this is under the Free Tier), and finally click on the Create button.
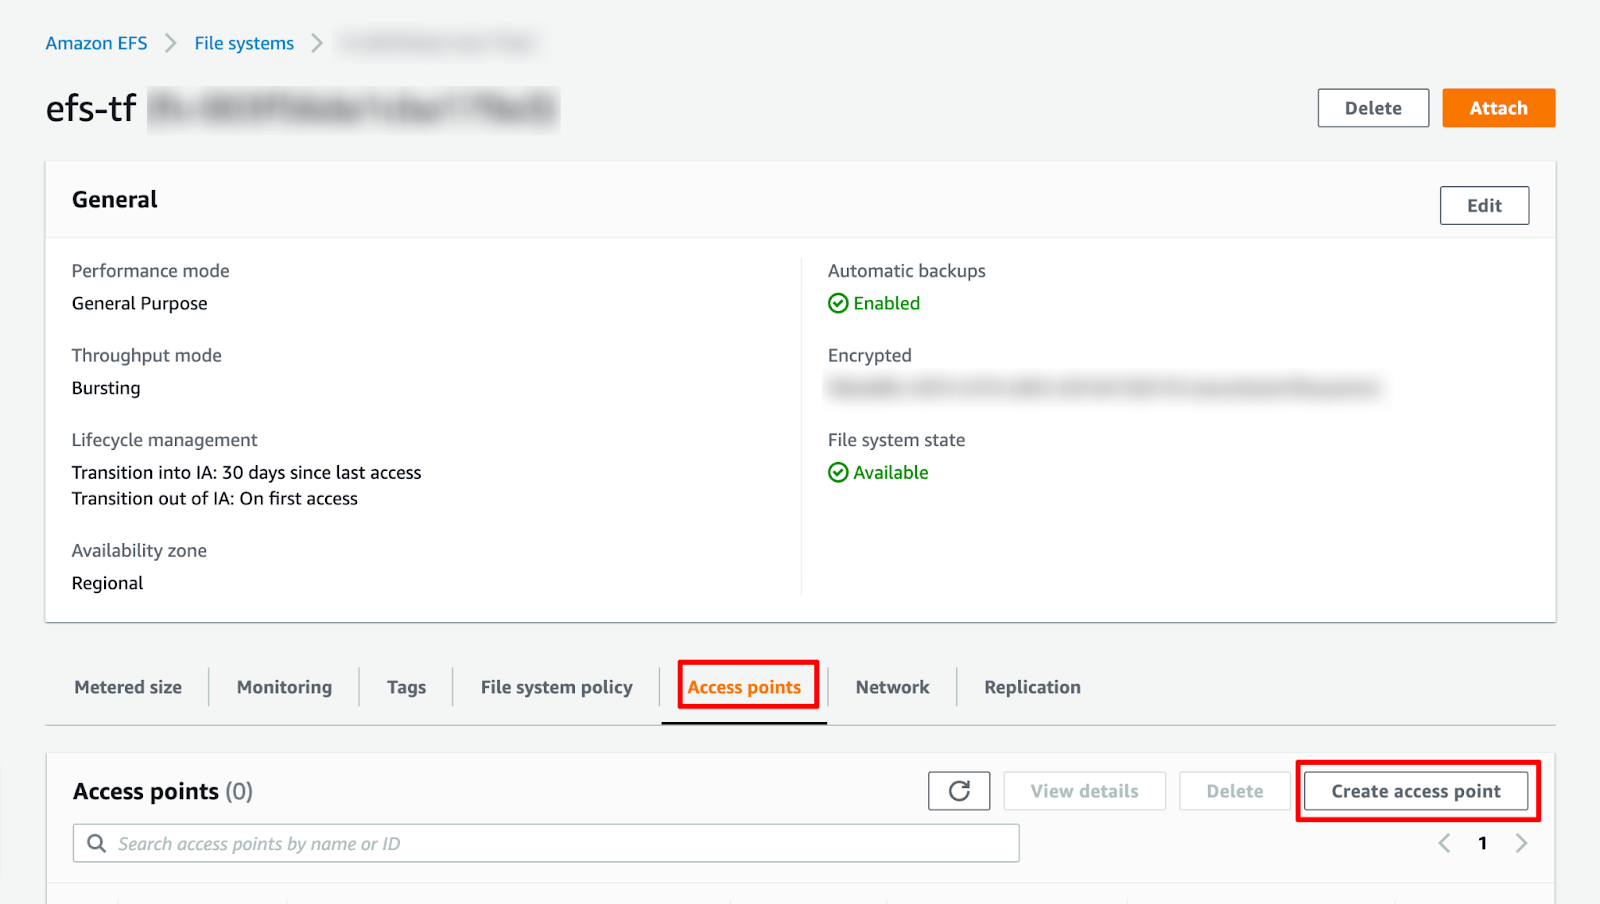
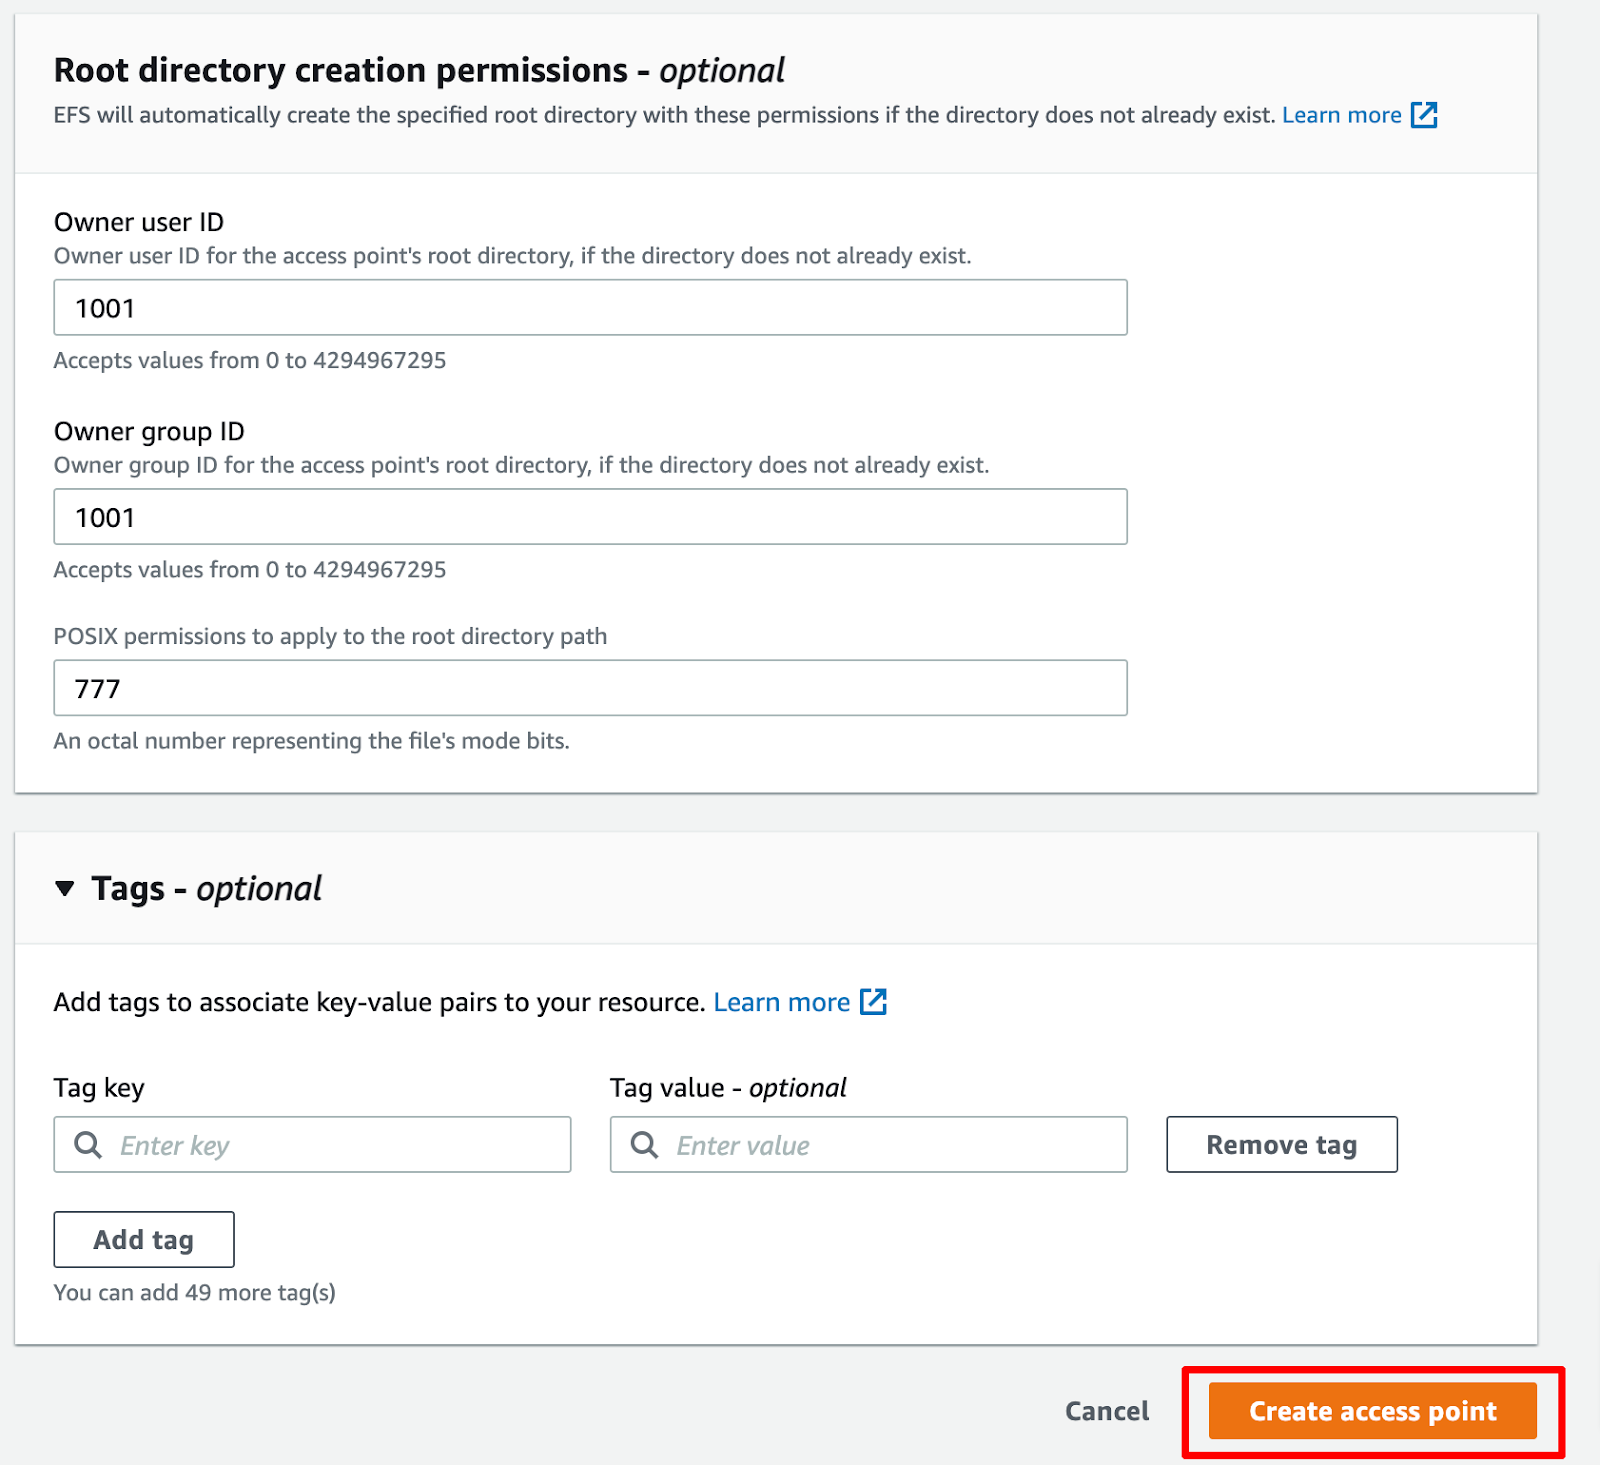
Then, create an Access point. This is how the Lambda function, that we will create later, is going to access the EFS file system.
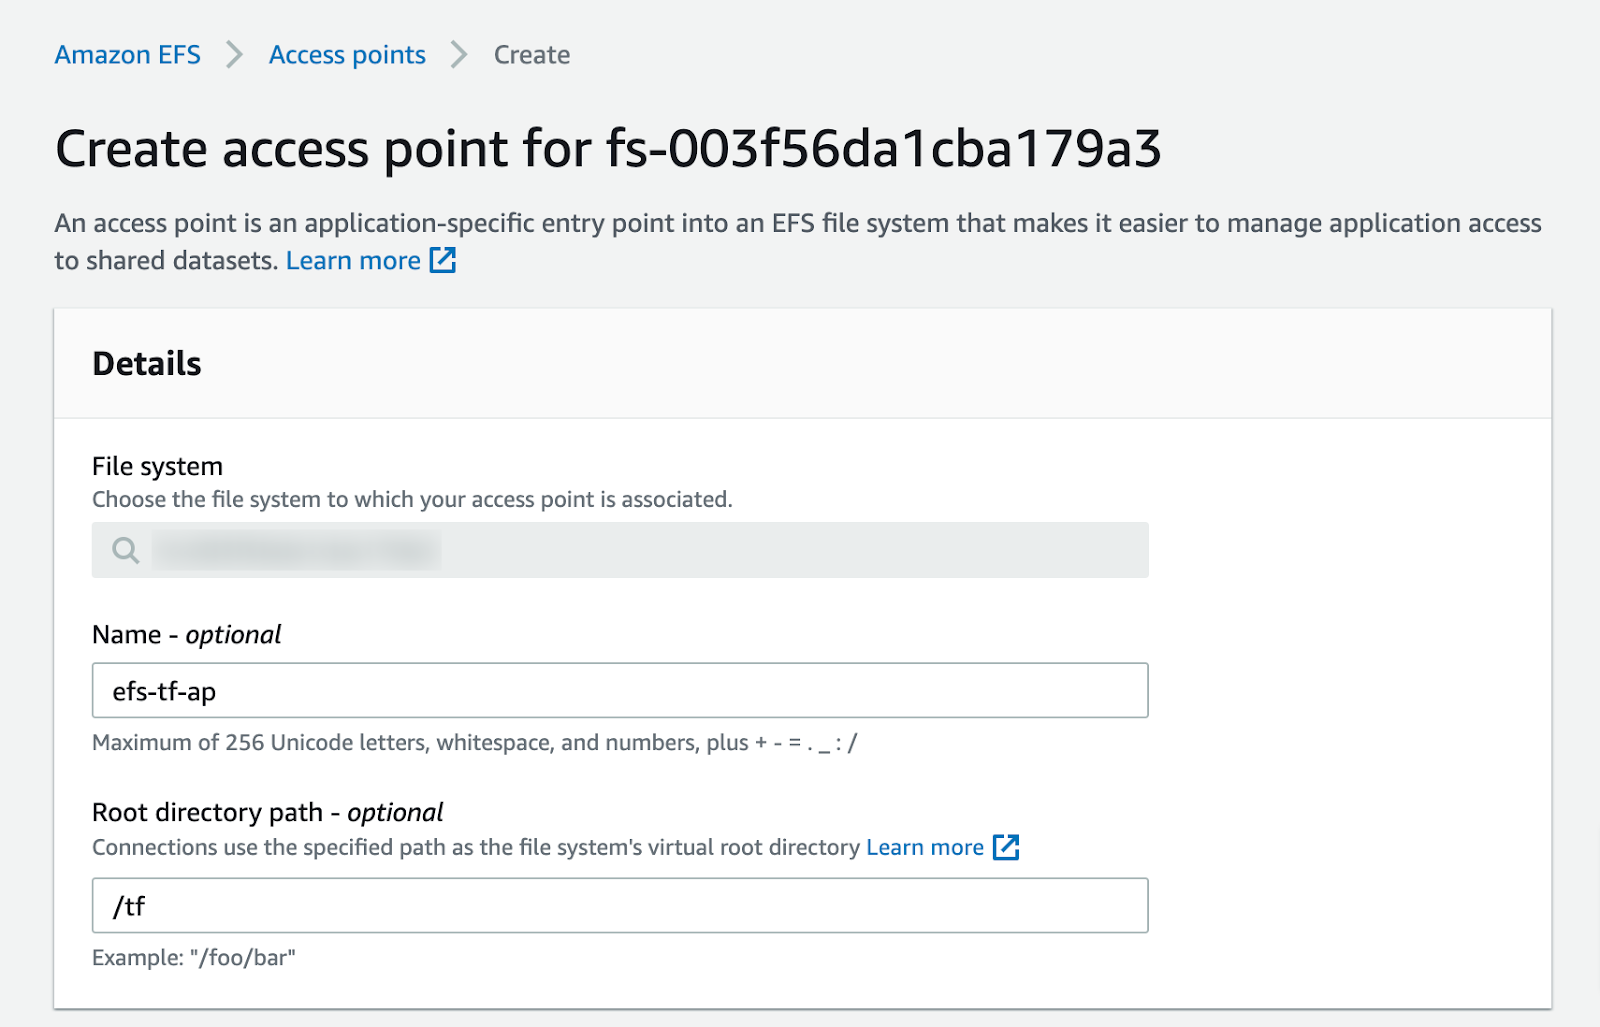
Type a name and a root directory path, in this case, we set it to: efs-tf-ap and /tf respectively.
Also, set owner ids to 1001 with a 777 permission. Finally, click on the Create access point button.
Accessing the EFS file system through EC2
There are many ways to access the EFS file system and install dependencies, emulating a Lambda environment. For example, it is possible to use the AWS CLI and a Docker container image in order to emulate the behavior of that environment. But, in this article, we are going to use an EC2 instance to access our EFS file system and install all the needed dependencies for our TensorFlow inference model.
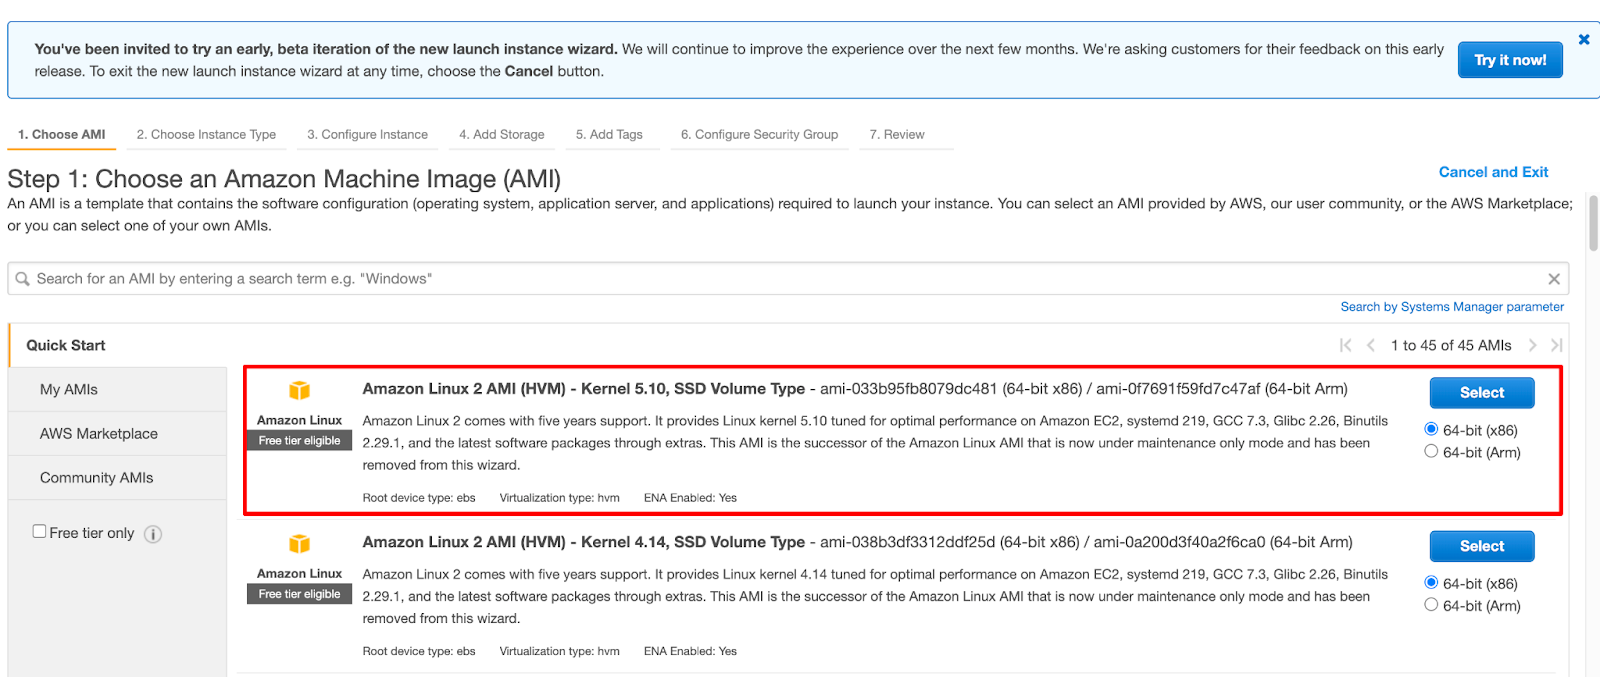
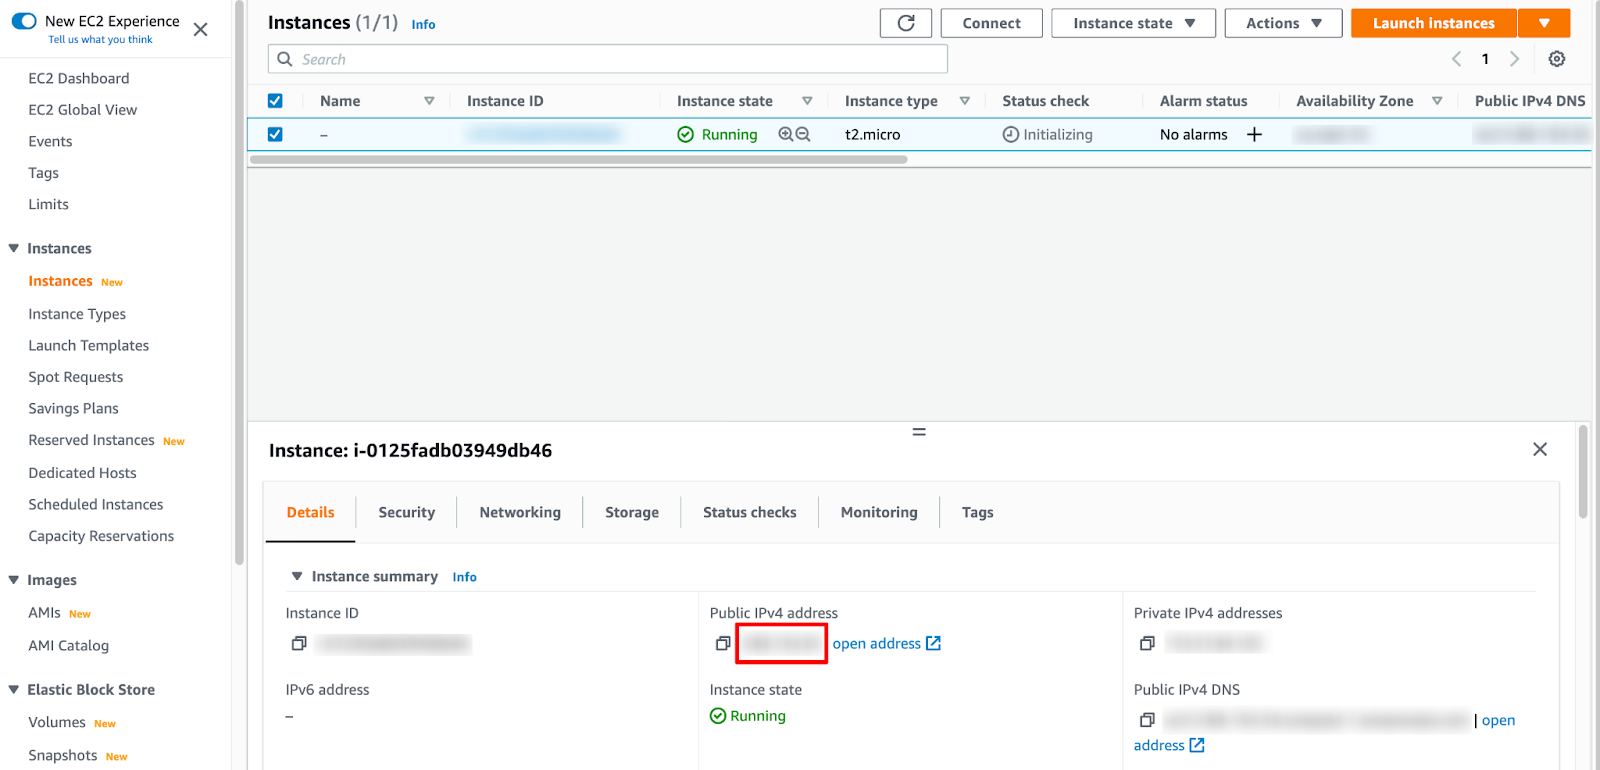
Go to EC2 and select the Launch instances button.
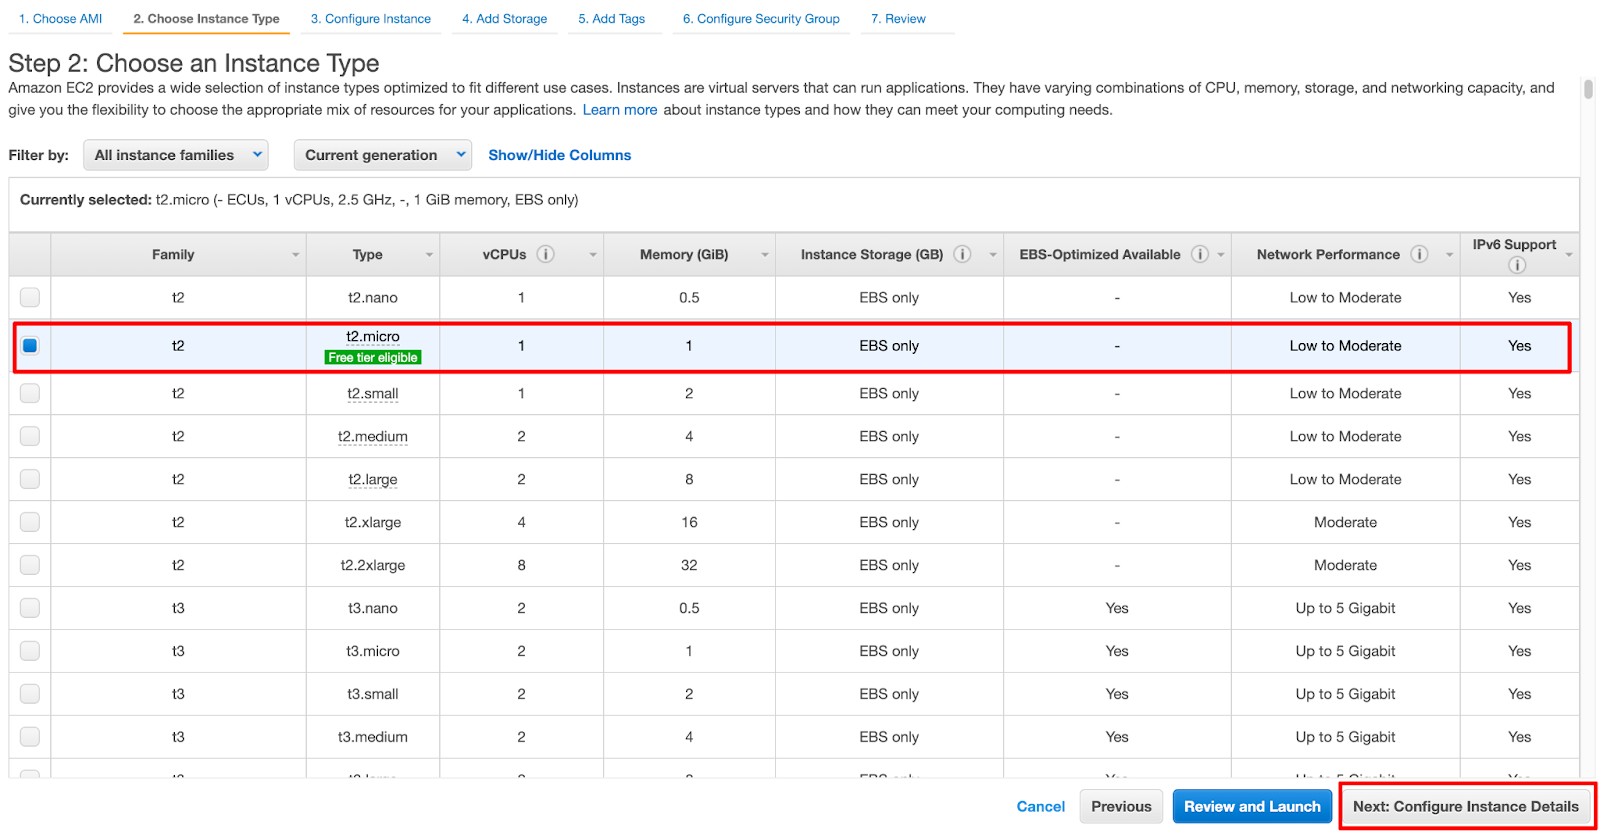
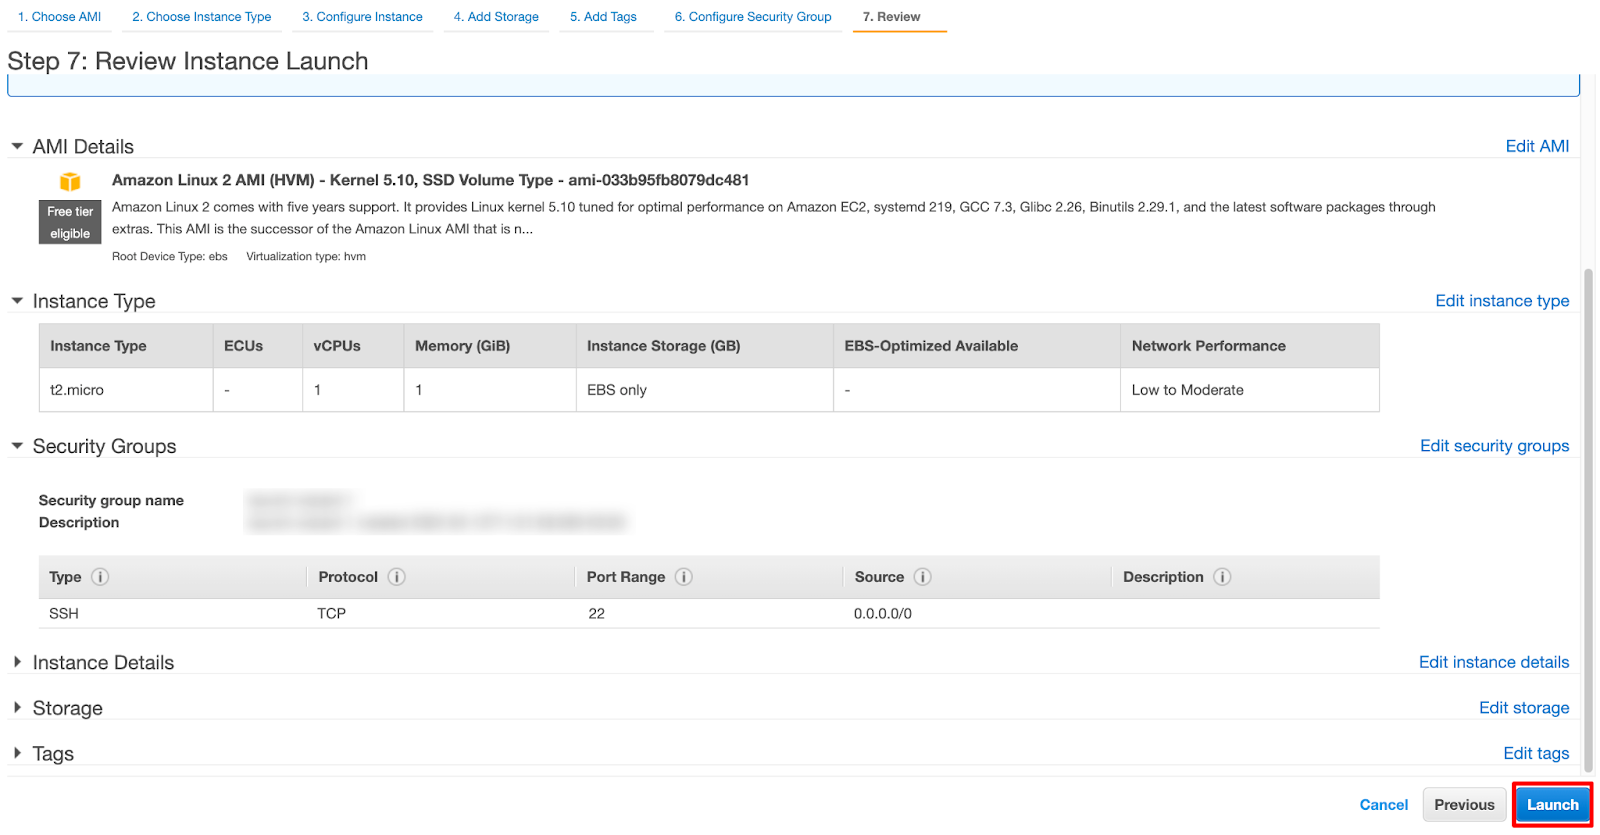
Select t2.micro as the instance type, as it is under the free tier.
Note: if your model is too big and needs some processing when downloading, maybe it would be necessary to change this instance to a higher one. Please keep in mind that this instance is only to be used for downloading dependencies and models.
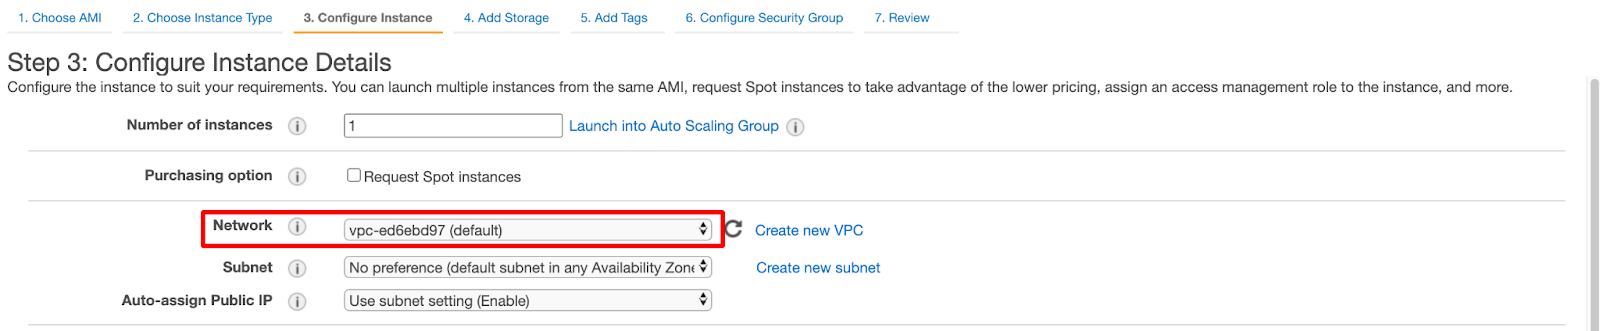
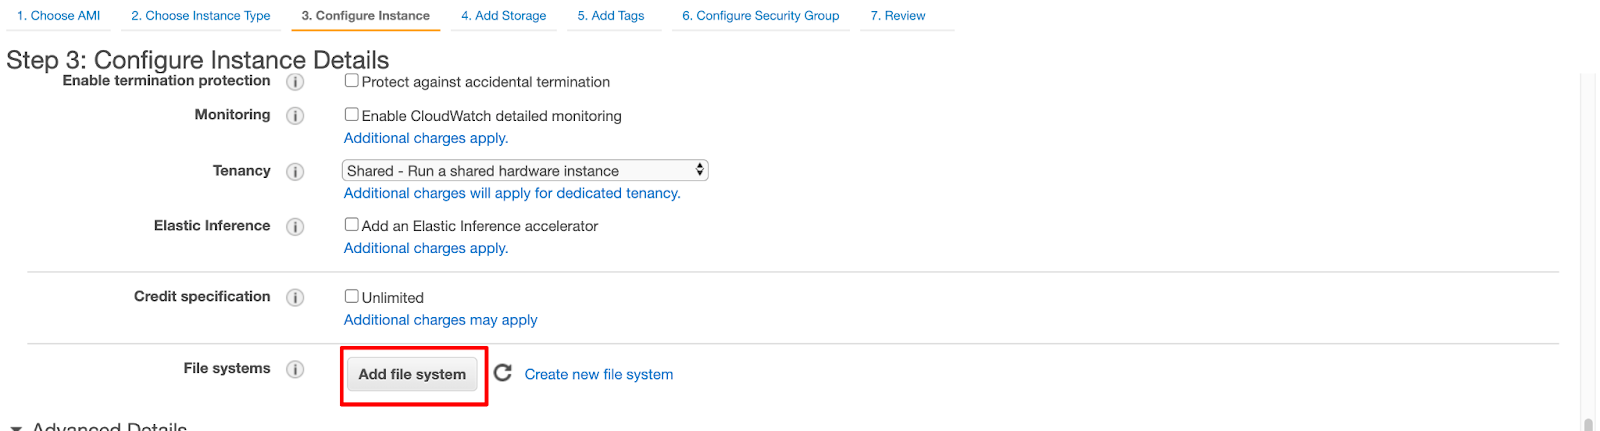
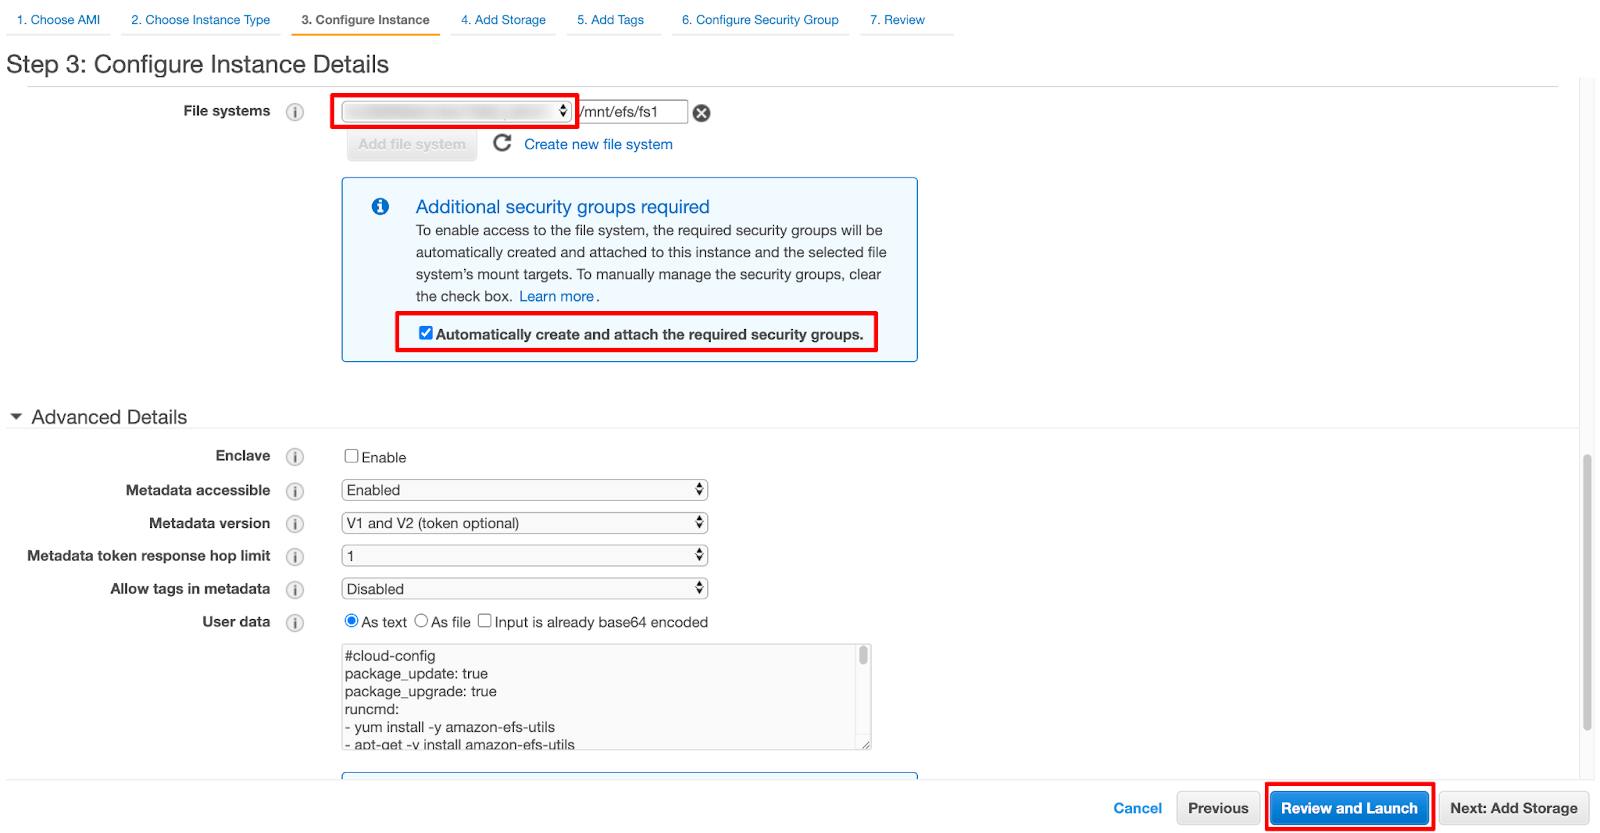
Choose the same VPC selected in the EFS file system
Select the EFS file system created in the steps above and tick Automatically create and attach the required security groups.
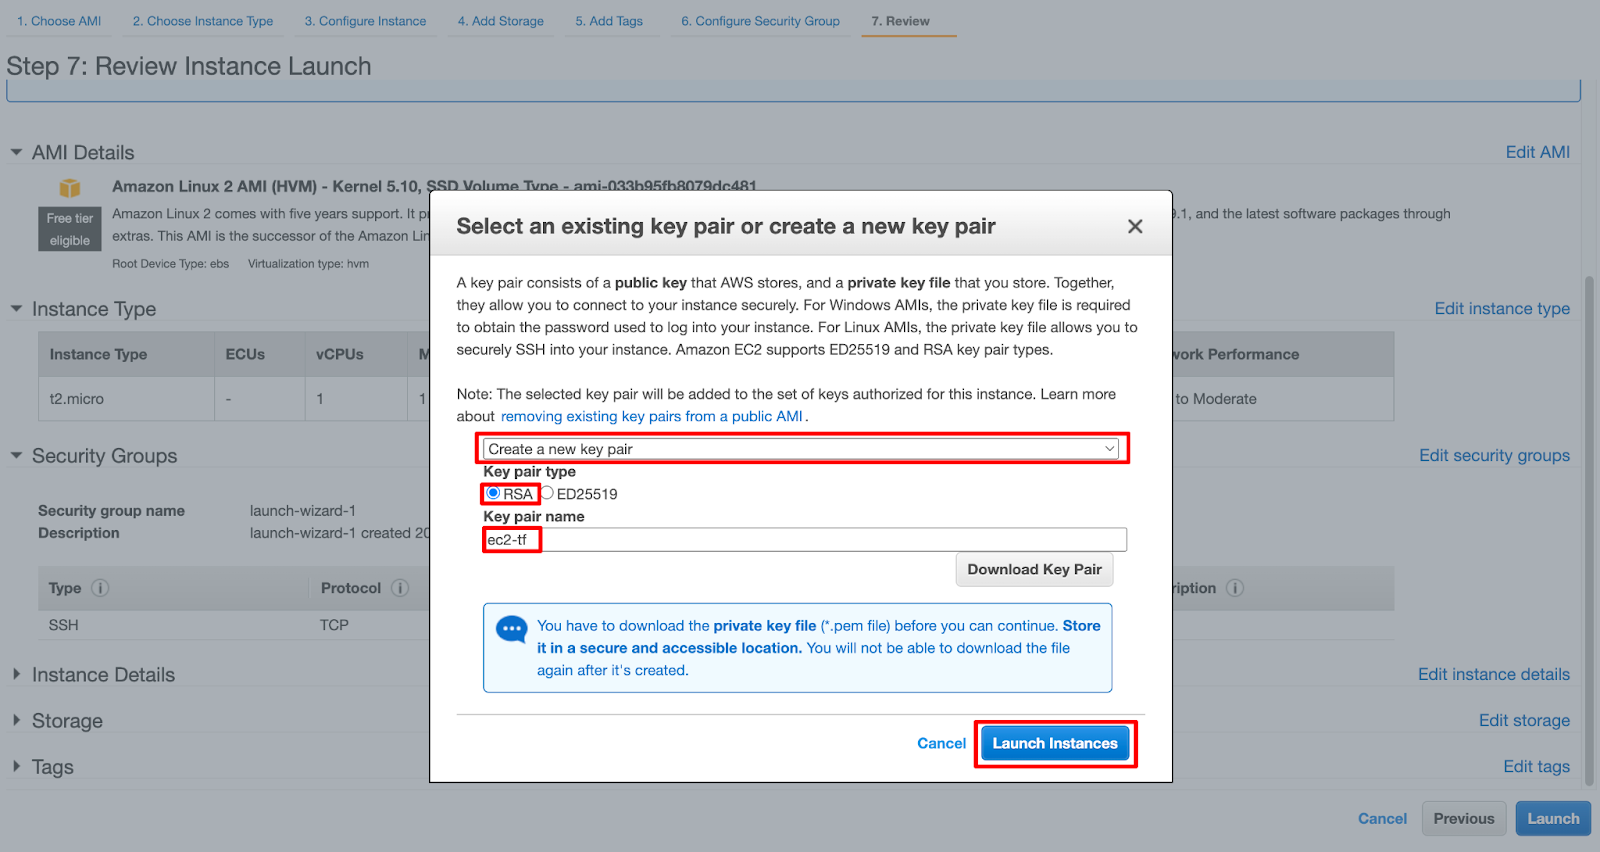
Finally, check if SSH is open to the internet.
Download that key; we are going to need it later in order to connect to that EC2 through SSH.
cd /mnt/efs/fs1/tf
wget https://storage.googleapis.com/download.TensorFlow.org/models/tflite/mobilenet_v1_1.0_224_quant_and_labels.zipunzip mobilenet_v1_1.0_224_quant_and_labels.zip
rm mobilenet_v1_1.0_224_quant_and_labels.zip
Finally, we must set permissions for user 1001 to This is the one that Lambda will use through the access point created earlier.
sudo chown -R 1001:1001 /mnt/efs/fs1/tf
When everything is set, this EC2 instance can be terminated (deleted). If you want to change or update the dependencies on the EFS file system, you can launch another EC2 later and follow the same steps.
Creating a Lambda function
Creating Lambda role
Go to IAM and create a new role:
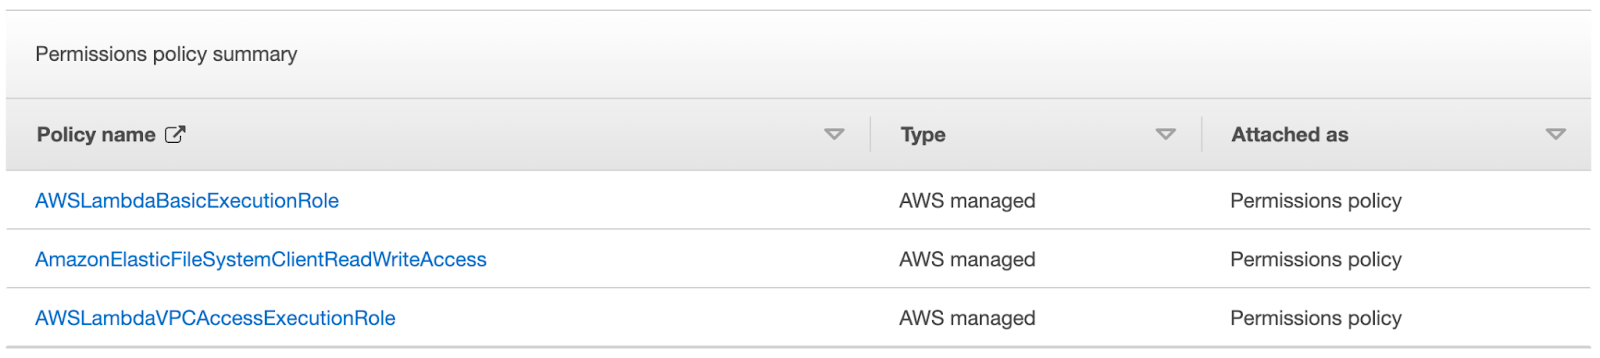
Add permissions:
AWSLambdaBasicExecutionRole
AmazonElasticFileSystemClientReadWriteAccess
AWSLambdaVPCAccessExecutionRole:
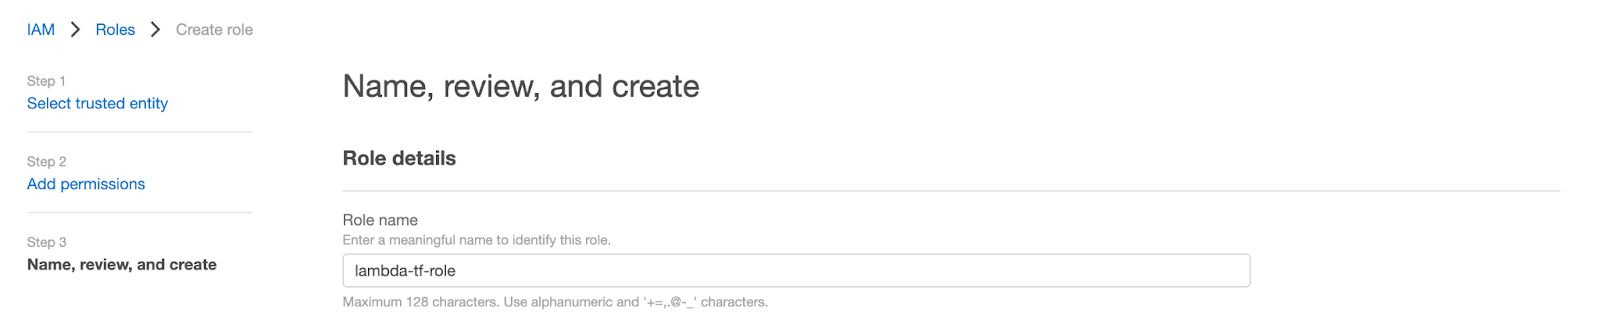
Finally, type a recognizable role name and click on the Create role button:
Creating Lambda function
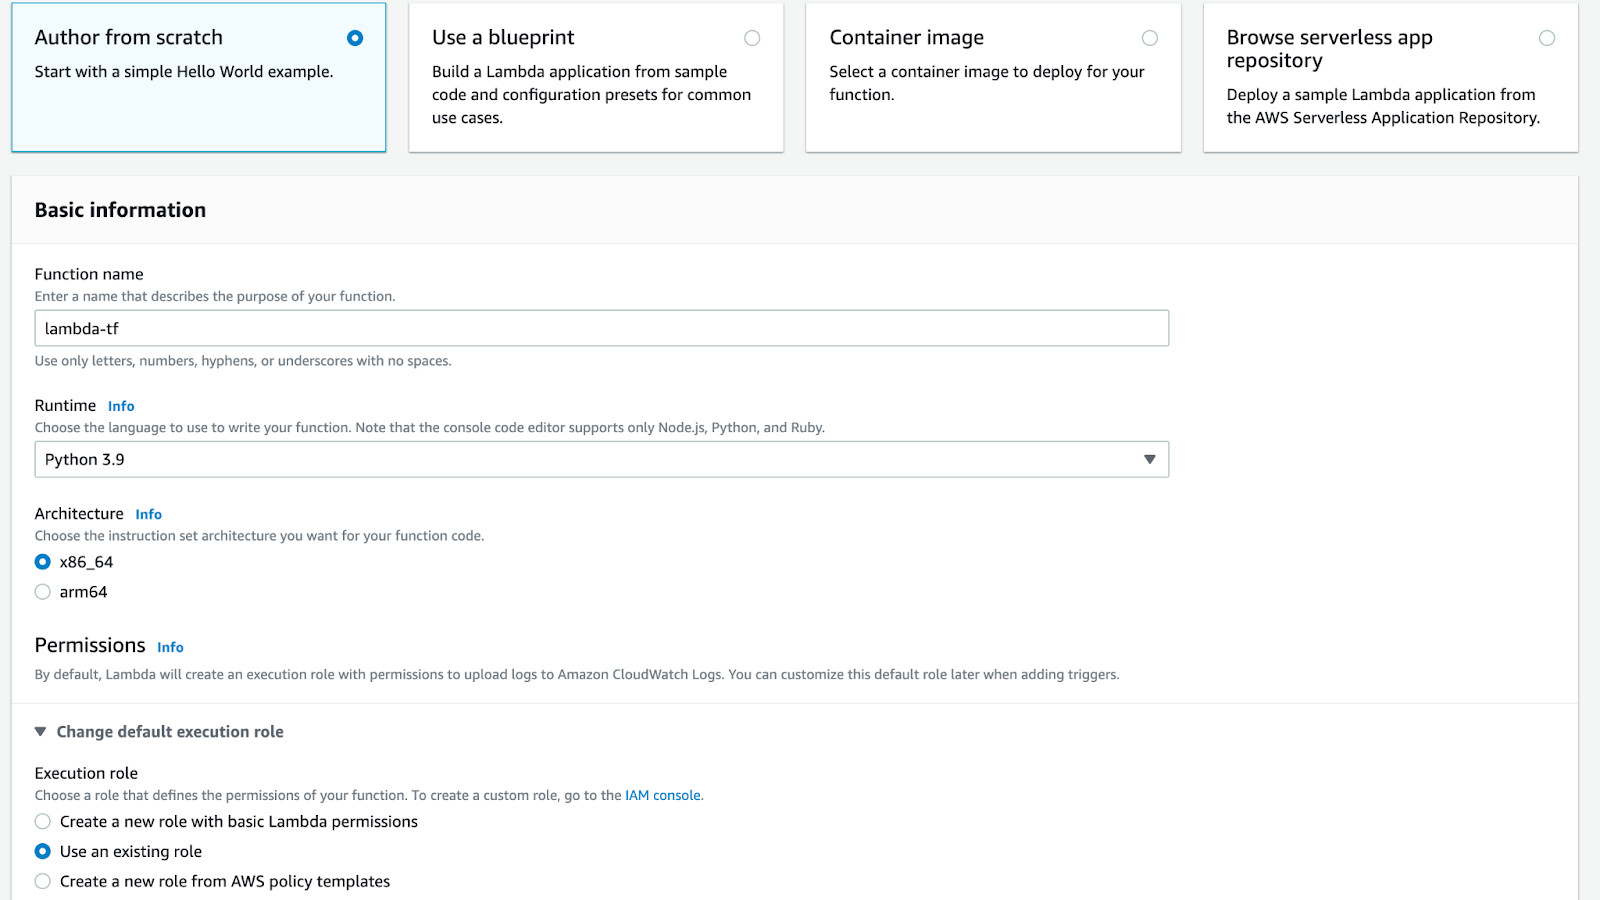
Go to the Lambda page and click on Create function:
Type a function name, select Python as runtime, x86_64 as architecture.
Note: Set the Python version to the same as when you installed dependencies with EC2 in the previous section.
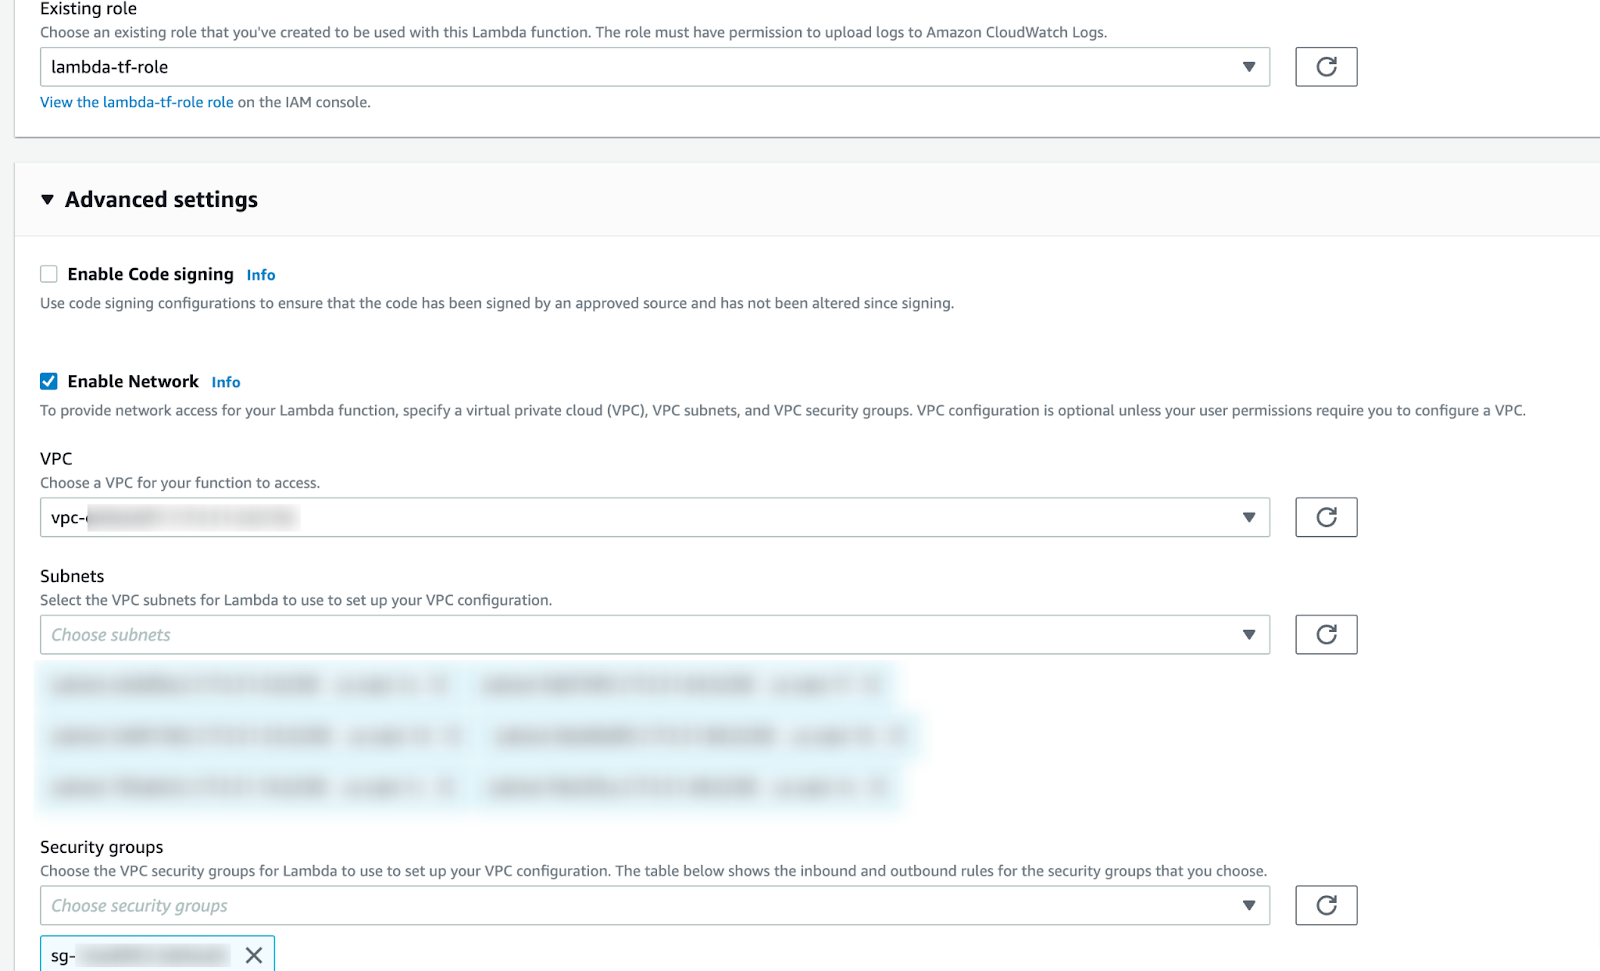
On the execution role, select the existing role and choose the one we created in the above step. In advanced settings, tick enable network and choose the VPC that we used in EFS and the same subnets and security groups as well.
Note: This is only for testing purposes, please set proper security settings if used in a prod environment.
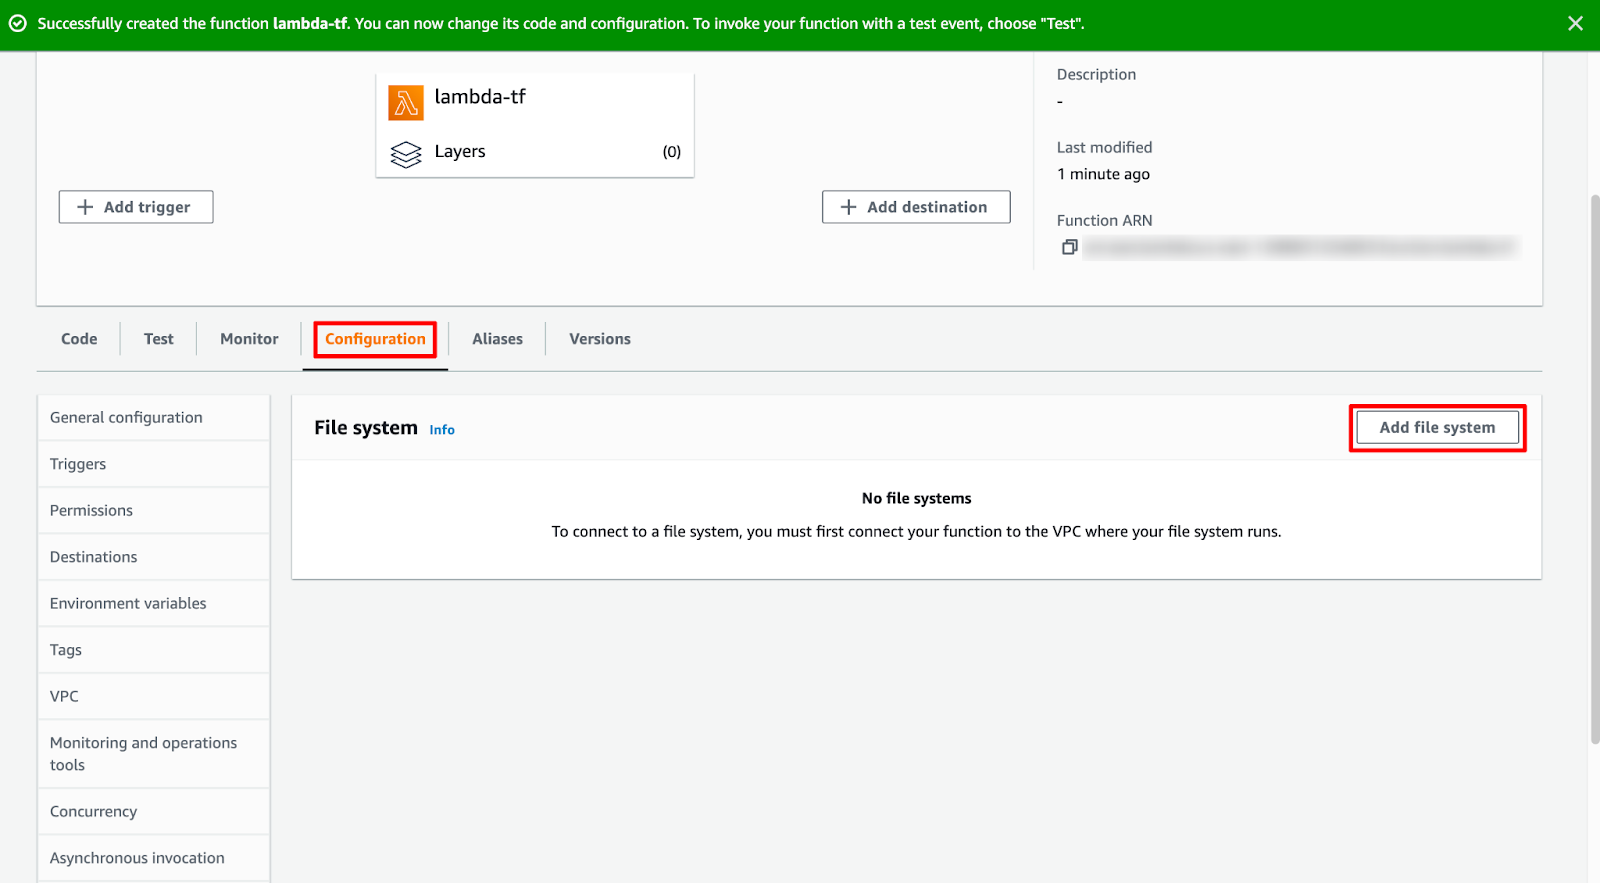
Now, select the Configuration tab and then the Add file system button.
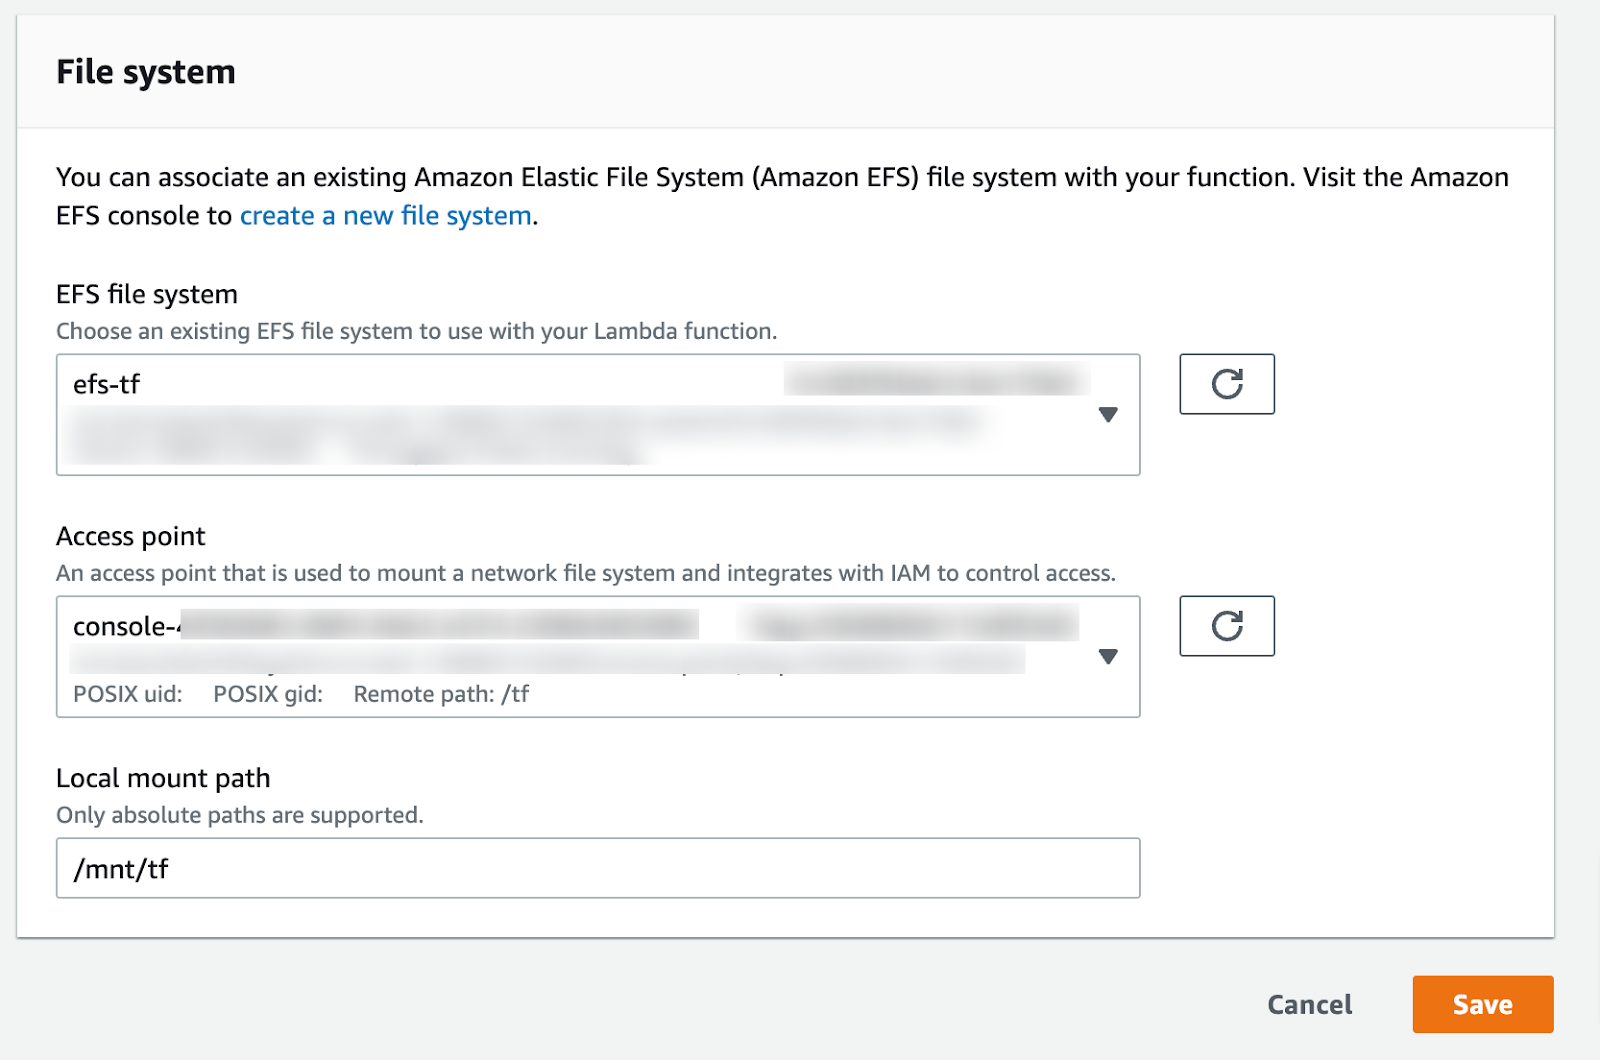
Select the EFS file system that we created before and the access point as well. Set /mnt/tf as the local mount path. Finally, hit the Save button.
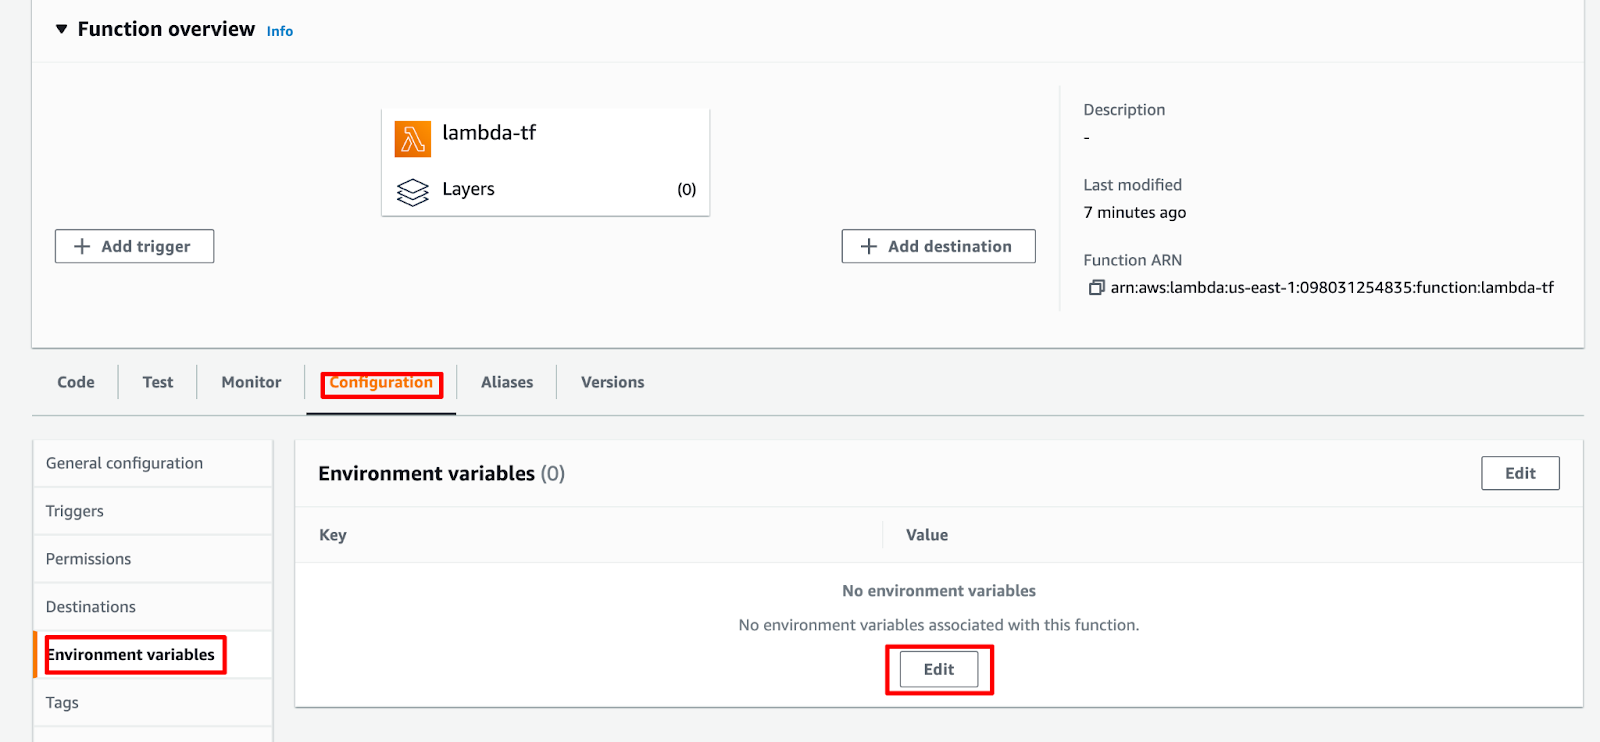
We need to set Pythonpath to point to our EFS file system. To do so, click on the Configuration tab, Environment variables, and then on the Edit button.
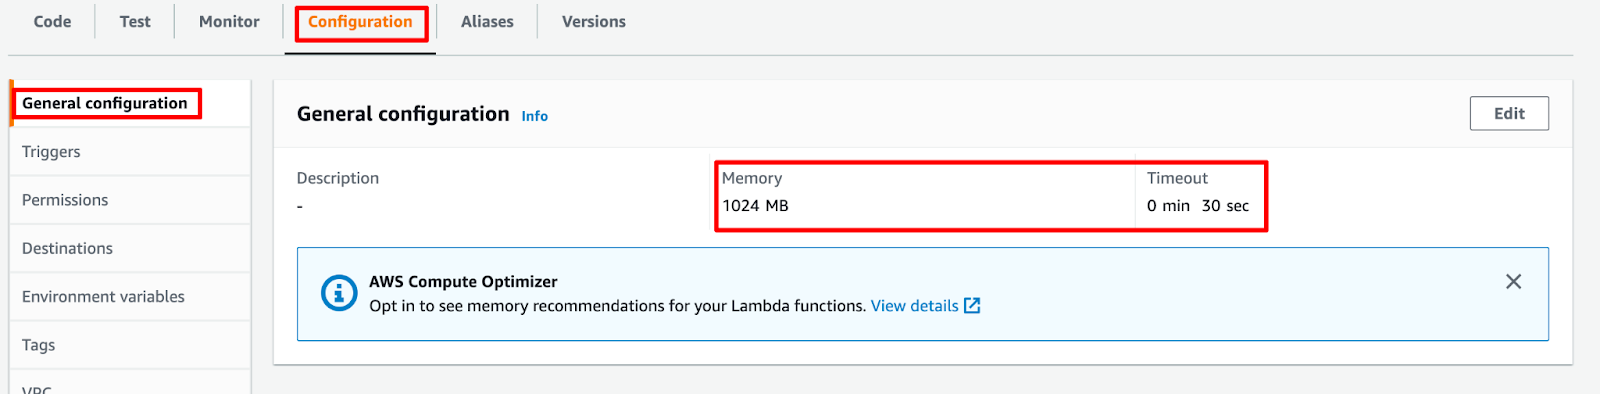
In general, configuration, set at least 1024MB of RAM and a 30-second minimum timeout. These values can be modified at your will.
Now we have our Lambda function configured.
Lambda code
We can finally place our code in the Lambda function.
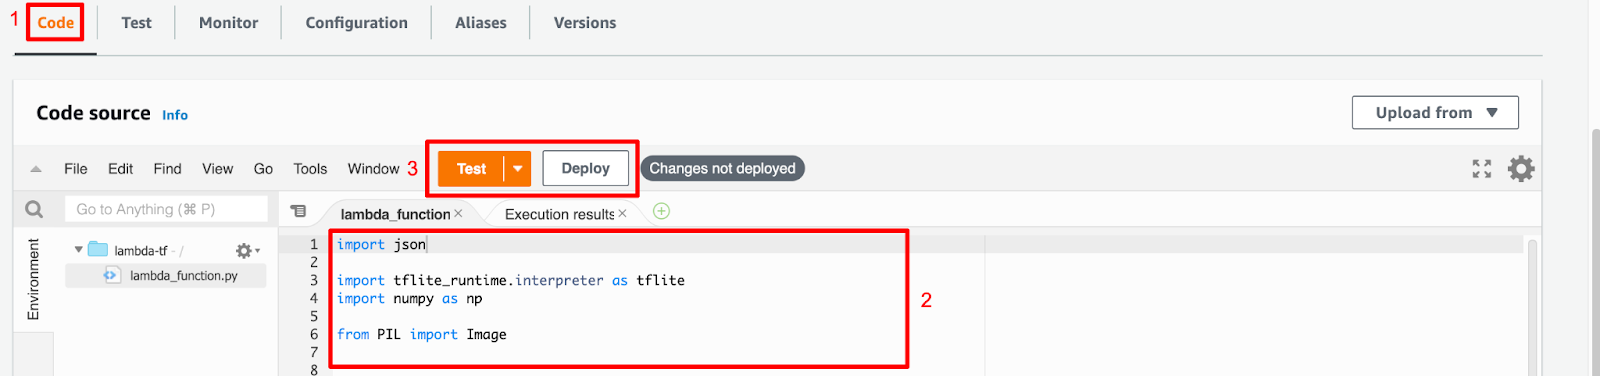
Go to the Code tab, then paste the following code, and finally push the Deploy Button.
import json

import TensorFlow as tf
import numpy as np

from PIL import Image
from io import BytesIO
import base64
import re


def Lambda_handler(event, context):
   # load the image
   image_data = re.sub('^data:image/.+;base64,', '', event['file'])
   image = Image.open(BytesIO(base64.b64decode(image_data)))

   # load the labels
   with open('/mnt/tf/labels_mobilenet_quant_v1_224.txt', 'r') as f:
       labels = {i: line.strip() for i, line in enumerate(f.readlines())}

   # load the model
   interpreter = tf.lite.Interpreter(model_path='/mnt/tf/mobilenet_v1_1.0_224_quant.tflite')
   interpreter.allocate_tensors()

   # get model input details and resize image
   input_details = interpreter.get_input_details()
   iw = input_details[0]['shape'][2]
   ih = input_details[0]['shape'][1]
   image = image.resize((iw, ih)).convert(mode='RGB')

   # set model input and invoke
   input_data = np.array(image).reshape((ih, iw, 3))[None, :, :, :]
   interpreter.set_tensor(input_details[0]['index'], input_data)
   interpreter.invoke()

   # read output and dequantize
   output_details = interpreter.get_output_details()[0]
   output = np.squeeze(interpreter.get_tensor(output_details['index']))
   if output_details['dtype'] == np.uint8:
       scale, zero_point = output_details['quantization']
       output = scale * (output - zero_point)

   # return the top label and its score
   ordered = np.argpartition(-output, 1)
   label_i = ordered[0]
   result = {'label': labels[label_i], 'score': output[label_i]}
   response = {
       "statusCode": 200,
       "headers": {
           "Access-Control-Allow-Origin" : "*"
       },
       "body": json.dumps(result)
   }

   return response
This code basically receives a base64 image, then infers according to the model, and finally sends the results as a JSON object.
Please note that we are only using the "tf.lite.interpreter" method for testing purposes, but the full version of TensorFlow is loaded and available for use here.
Creating an API gateway
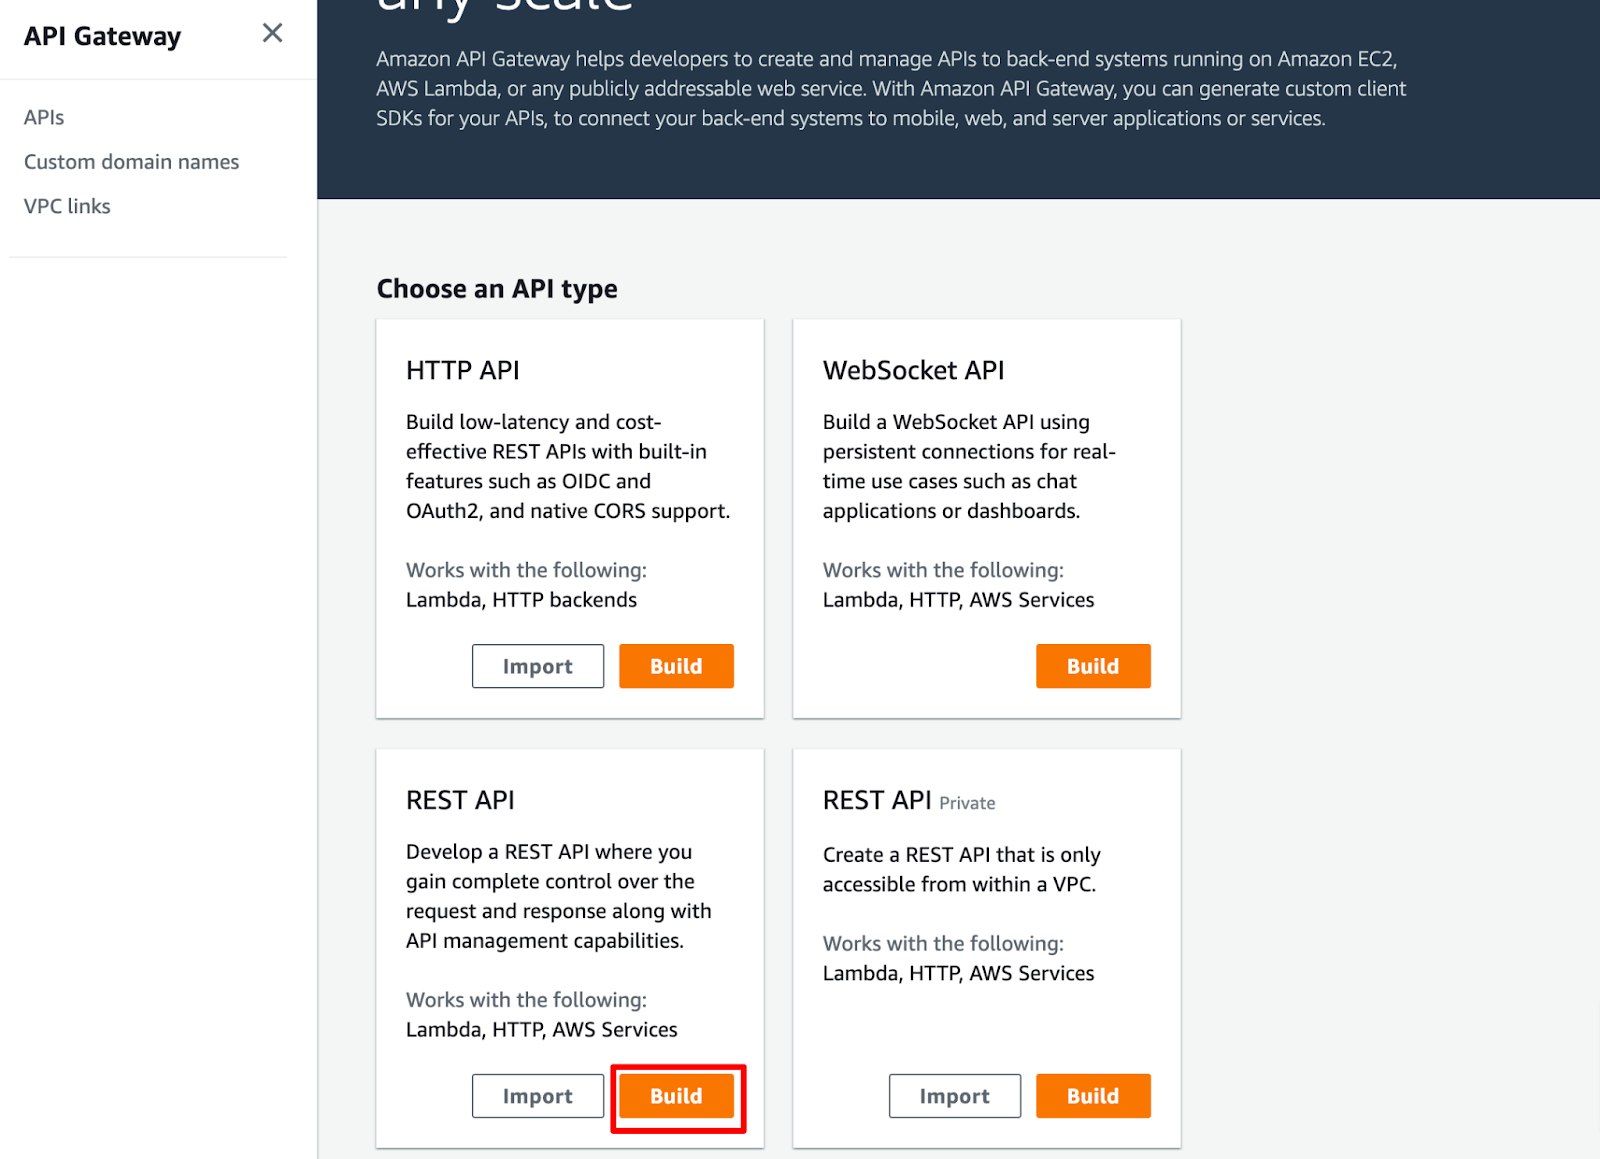
Go to API Gateway and click on REST API's Build button.
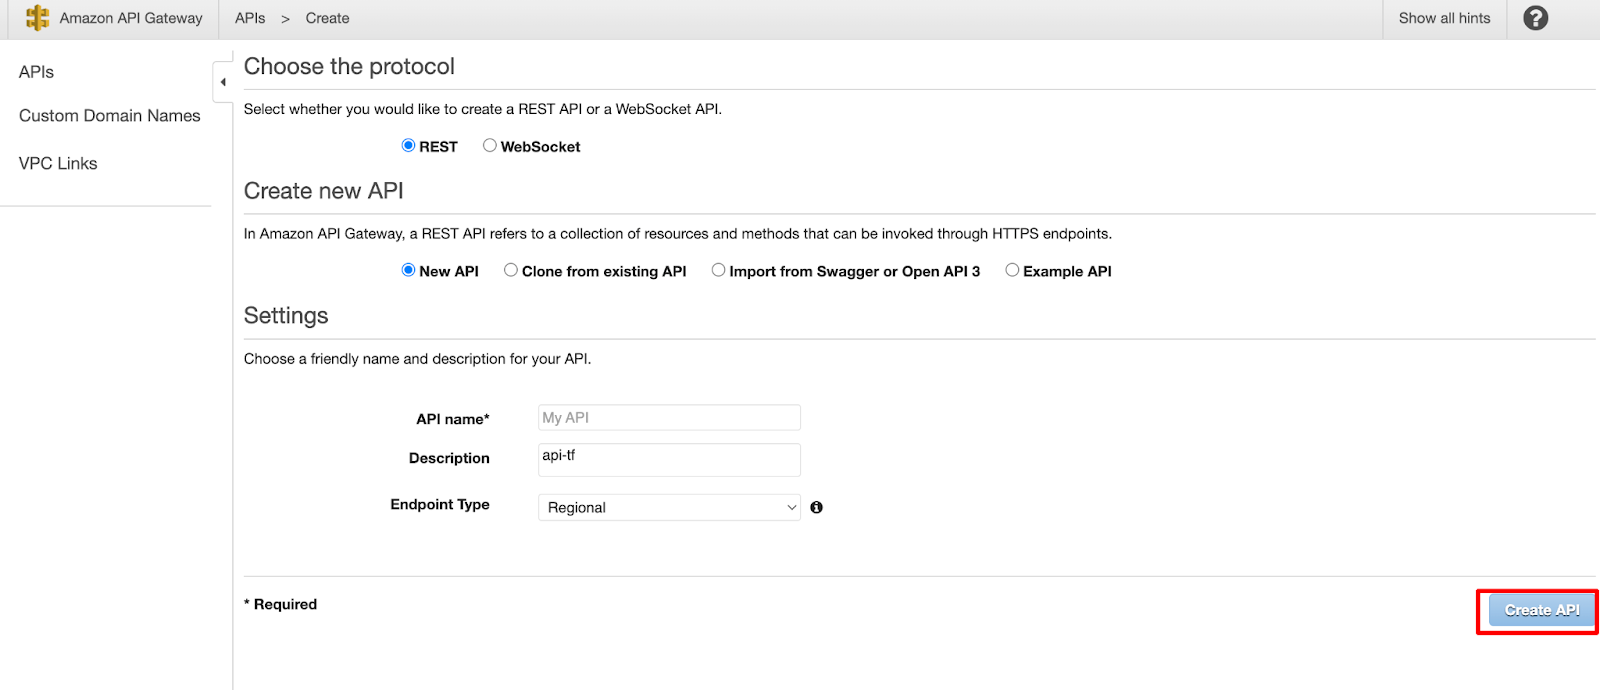
Choose REST protocol, New API, give a name in the Description field, and finally click on the Create API button.
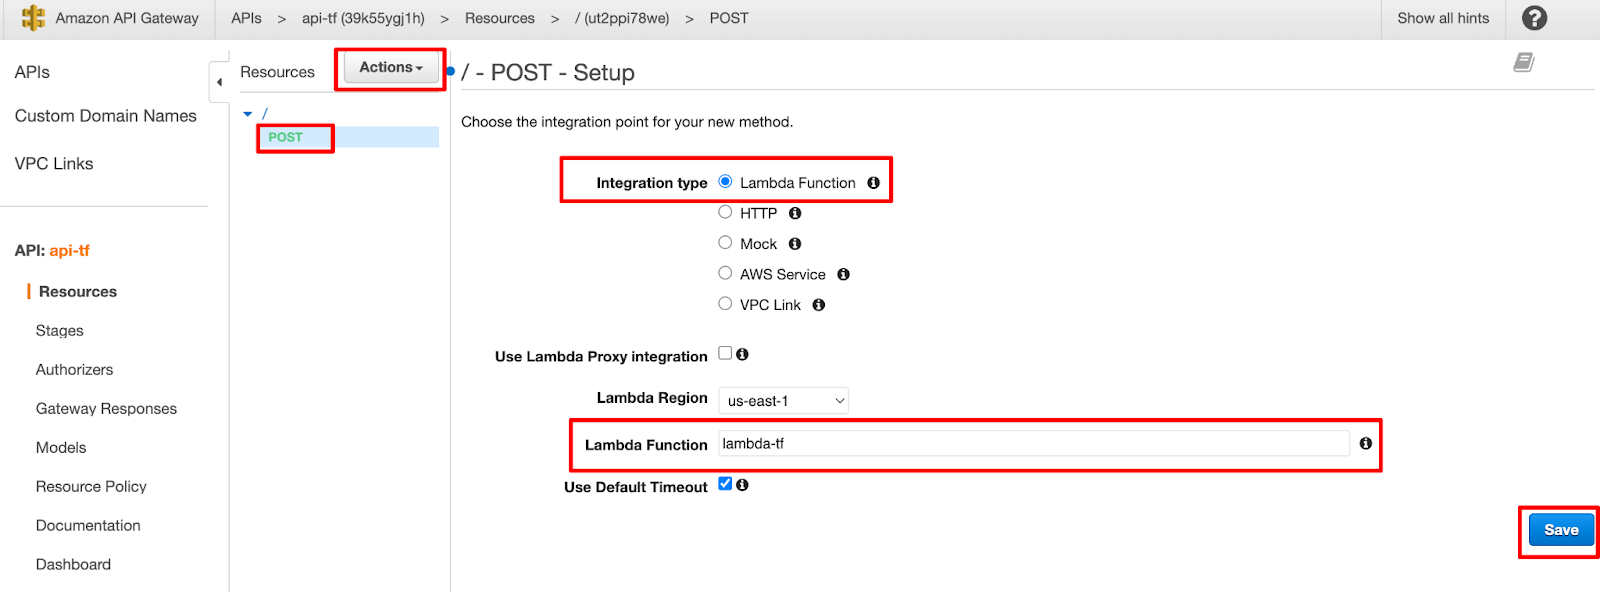
Under the Actions menu, click on Create method" then select POST. Later, select Lambda Function as the integration type, choose Lambda-tf (or the name of your Lambda function), and finally click on Save.
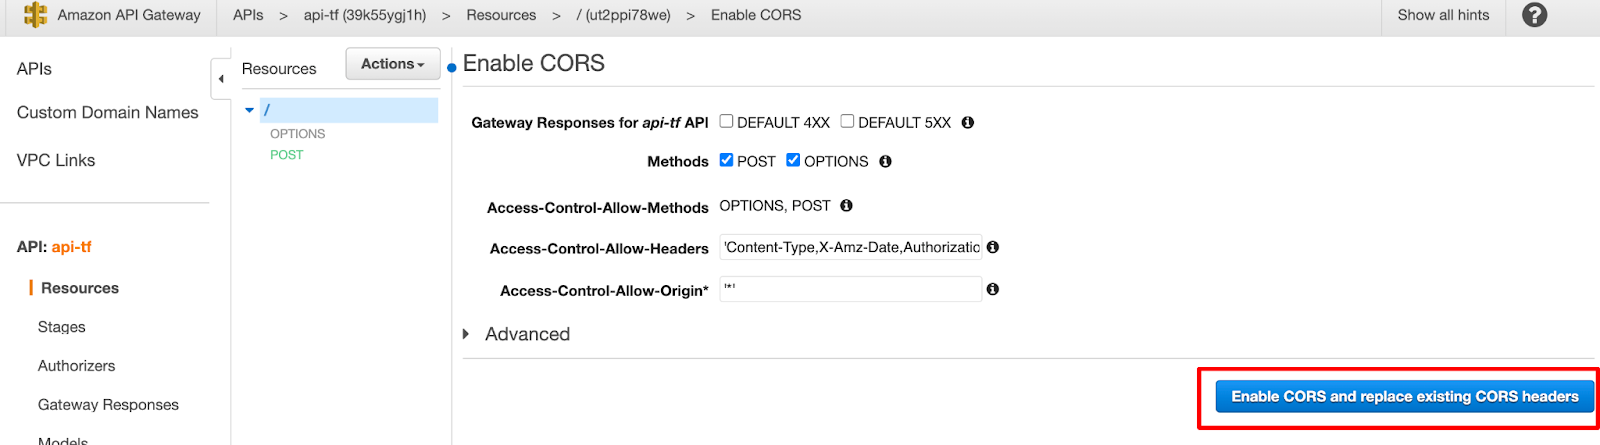
We need to enable CORS, so again click on the Actions menu and then select Enable CORS. Select all the methods and leave everything as-is. Finally, click on Enable CORS and replace the existing CORS headers.
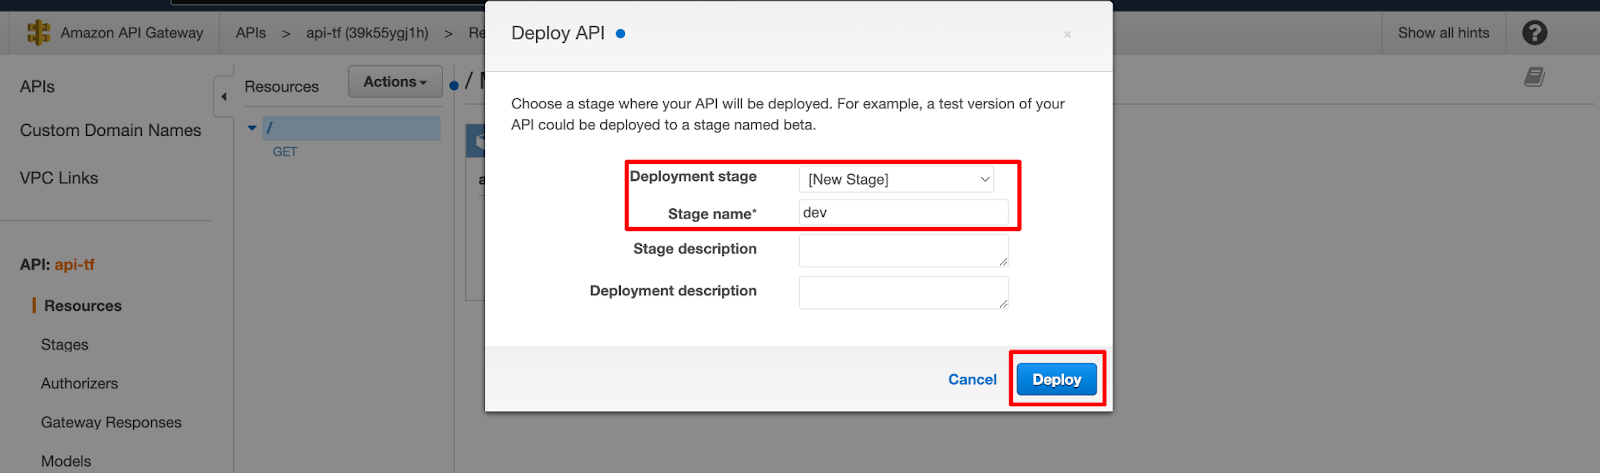
Now, we need to make the API public. In order to do so, click on the Actions menu, Deploy API. In that window, choose New Stage and then assign a name. Let's say "dev" is the name.
Finally, we have our API for public use. Please take that URL; we are going to need it in the next section.
Creating a simple web application
Create an HTML file with this content. Replace API_URL with the one with got from the previous step:
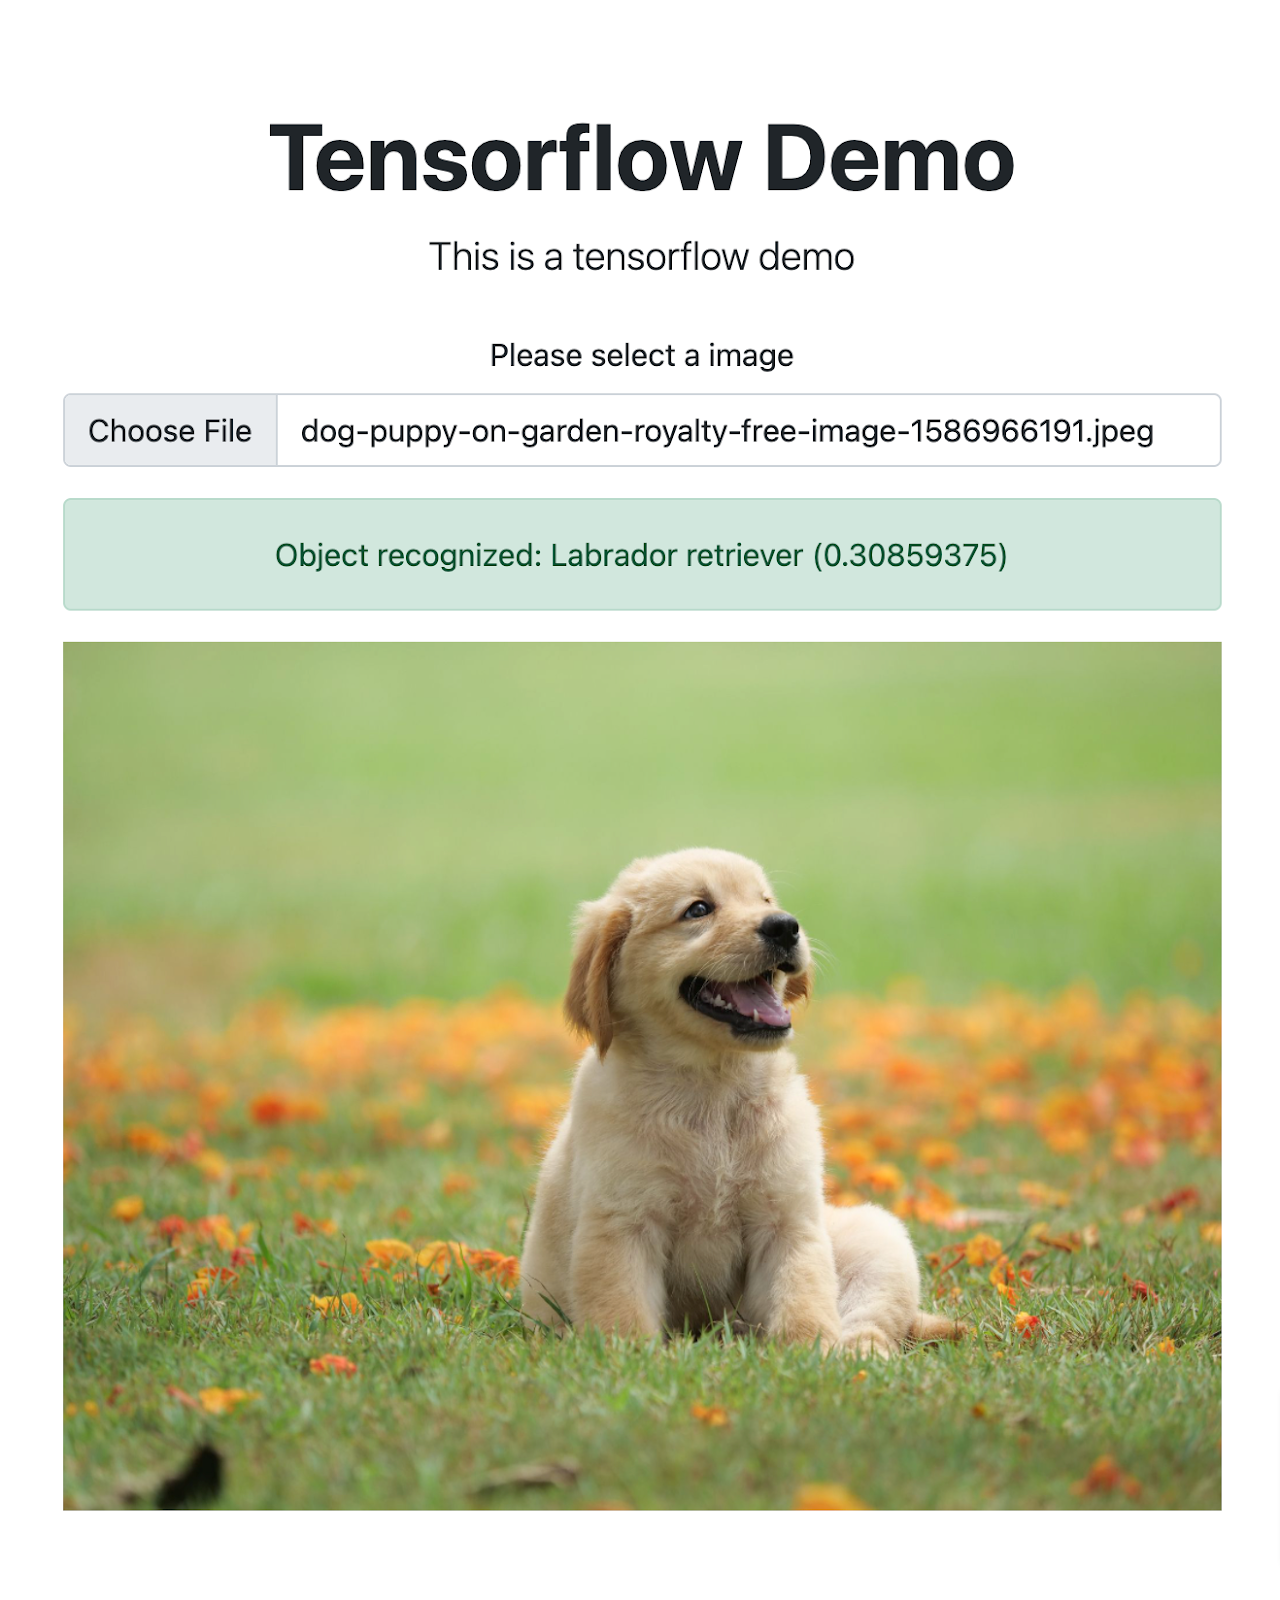
Open the HTML file created in the last step on a web browser. That should look like this:
You can check out a functional demo here. This demo shows all the components that we have created throughout this tutorial working together. If accessed from a mobile device, you can also use your own camera.
Please consider that the first invocation can take some seconds, but later recognition can run in milliseconds.
Conclusion
Throughout this tutorial, we have created a Lambda function that can be used to infer pre-trained TensorFlow models using libraries of virtually any size with the help of an EFS file system. We have exposed that function to the public through a REST API Gateway and, finally, developed a simple web application that uses all that infrastructure.
It is important to note that the use of this infrastructure is almost at zero cost. Under the Free Tier, you can have up to one million Lambda requests at no cost , and the use of EFS and API Gateway is pretty cheap after the first year. Depending on the scenario (storage amount and requests), we are talking about a dollar or a few bucks per month in terms of costs. And, as a serverless infrastructure, you pay as you go.
There are also downsides to this implementation as well. For example, the use of Lambda functions requires a little boot time (cold-start) the first time it is invoked. Depending on the model and library size, it could take a few seconds or even minutes most of the time. This can be reduced by using provisioned concurrency. Another way to reduce this time is by calling the function at application startup, so when the user hits the button, the model is probably already in memory.
Can I use full TensorFlow in AWS Lambda despite its size limits?
Yes. By storing dependencies and models in an EFS file system and mounting it to Lambda, you can work with TensorFlow libraries larger than the Lambda package limit.
Which AWS services are required?
You need AWS Lambda, API Gateway, and EFS. Optionally, an EC2 instance can be used to prepare dependencies on EFS.
How does the Lambda function handle images?
It receives a base64-encoded image, loads the TensorFlow model from EFS, performs inference, and returns the recognized object with its score as JSON.
Is this setup free under AWS Free Tier?
Yes. Lambda offers 1 million free requests per month, API Gateway has a free tier for the first year, and EFS provides 5GB of free storage.
How can I reduce cold-start delays for large models?
Use provisioned concurrency or call the function once at application startup to pre-load the model into memory.
AI is changing software development.
The Engineer's AI-Enabled Development Handbook is your guide to incorporating AI into development processes for smoother, faster, and smarter development.
Enjoyed the article? Get new content delivered to your inbox.
Subscribe below and stay updated with the latest developer guides and industry insights.
Thank you! Your submission has been received!
Oops! Something went wrong while submitting the form.
We use cookies to provide our services, to allow us to better understand our audience, and to provide and serve personalized ads or content. By using our website, you consent to the terms of our Privacy Policy and our Cookie Policy, and the use of cookies, pixels, and other technology as described more fully therein
The GPC signal has been honored.
Thank you! Your submission has been received!
Oops! Something went wrong while submitting the form.
.svg)